Resistors are the fundamental component of electronics. Resistance is the resistor’s ability to oppose the current flow in the circuit. The measurement of resistance is a crucial step in circuit design.
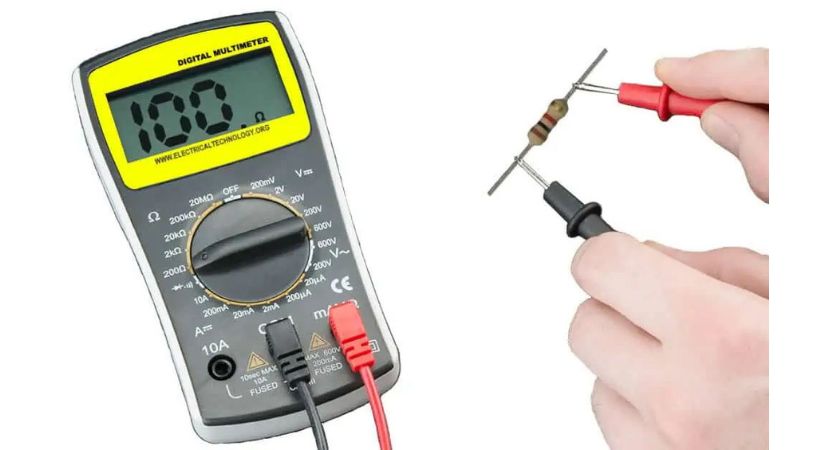
A multimeter is used to measure the resistance. A multimeter has the Ohm mode (Ω), which you must choose before proceeding. But if you are using a manual multimeter, then you have to select the range along with Ohm mode. After this, you have to connect the probes of the multimeter to each end of the resistor and the result will be displayed on the screen.
In this article, we’ll talk about the resistance measurement of the resistors using a versatile tool called a multimeter.
Resistance measurement
Resistance is the property of the resistor that opposes the flow current passes through it. It is represented by “R”.
The unit of resistance is the ohm (Ω), named after the German physicist Georg Simon Ohm, who first formulated the relationship between voltage, current, and resistance.

The measurement of resistance is essential to selecting the right resistor for the project to Validate the integrity and performance of electronic circuits.
The color code of resistors is also one of the ways to measure resistance but it is sometimes difficult to remember all code numbers and it is also time time-consuming process.
The multimeter is a tool that can measure the resistance of the resistor within a few seconds.
Multimeters are handheld devices that combine several measurement functions, including voltage, current, and resistance.
They typically feature a dial or buttons for selecting measurement modes, a digital or analog display, and probes for connecting to circuits or components.
If you are not familiar with multimeters, learn the basics by reading our article:
Let’s come to our topic and discuss how can you set your multimeter for resistance measurement.
Setting the multimeter
Setting up a multimeter for resistance measurement involves several steps to ensure accurate and reliable readings.
Below is a detailed guide on how to set a multimeter for resistance measurement:
1. Power On
The first step is to turn the multimeter On. Take your multimeter and turn it On for measurement.
2. Connect the probes
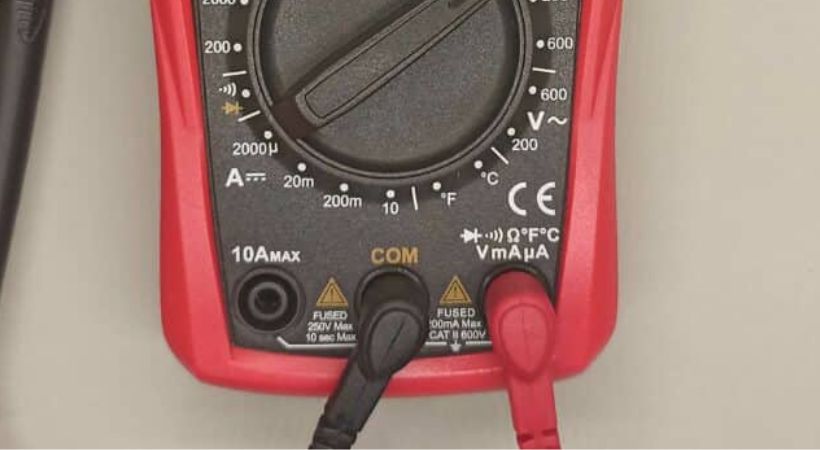
The next step is connecting the probes to the multimeter.

Connect the black probe to the COM terminal of the multimeter and the red terminal to the terminal that is assigned for resistance measurement.
3. Select the resistance (Ohms) mode
Set the function dial or select the appropriate mode for resistance measurement. This is usually denoted by the ohm symbol (Ω) on the dial.
4. Check the multimeter
Now check the multimeter, if it is in good shape and will provide accurate results or not. The two tests a multimeter should pass for further measurement are open and short-circuit tests.
In an open circuit test, keep the probes of the multimeter untouched if the multimeter shows “OL” or 1 it means the multimeter is good.
For a short circuit, you have to short the probes of the multimeter means touching the probes with each other, and if the multimeter shows zero resistance then a multimeter is accurate.
If the multimeter does not have the above results you have to check your multimeter for any broken connections or unindented connections.
5. Choose the measurement range
Depending on the expected resistance value of the component or circuit being measured, select the appropriate measurement range on the multimeter.
Most multimeters offer manual range selection or auto-ranging capabilities:
If your multimeter has manual range selection, choose a range higher than the expected resistance value to ensure accurate measurements. For example, if you expect the resistance to be around 500 ohms, select a range of 1kΩ (1 kilo-ohm) or higher.
In an auto-range multimeter, you don’t have to worry about the measurement range because a meter automatically selects the range according to the resistance measure value.
These are the steps that can effectively set up a multimeter for resistance measurement and obtain accurate readings for your electronic projects, troubleshooting tasks, or circuit analysis.
Step-by-step guide for resistance measurement
After testing the multimeter now it is time to measure the resistance of the resistor.
Here are steps on how can you measure the resistance.
- Take the resistor, you want to measure resistance.
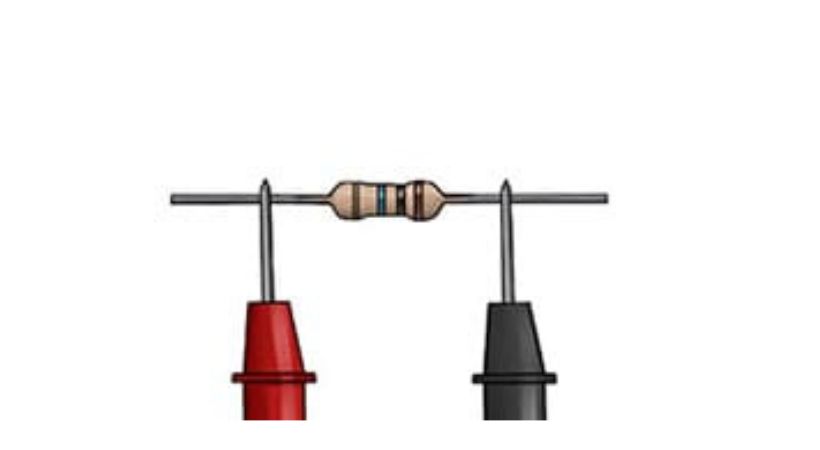
- Connect the probes of the multimeter to the legs of a resistor.

- Note that the resistor has no polarity, so it doesn’t matter in which way you connect the probes.
- If you have an auto-range multimeter the result will be displayed at the instant you connect the probes to the legs of the resistor.
- If you are using a manual range multimeter, so start with a minimum range and slowly increase the range.
- You can double-check the resistance value by again measuring it.
- After completing the resistance measurement, power off the multimeter and disconnect the probes from the circuit or component.
- Store the multimeter properly to prevent damage and ensure its longevity.
Always remember to handle the multimeter and electrical components with care to avoid damage and ensure safety.
Verification of measurement
You can also verify the results of the multimeter for resistance measurement.
The verification can done by comparing the results with the color code of the resistor. If you know how to read the color code of the resistor it will be very easy for you.
Don’t worry if you don’t know how to read the value, here is our detailed article on
By verifying the multimeter’s resistance measurements using the color code of resistors, you can ensure the accuracy and reliability of your measurements and identify any discrepancies or errors in the measurement process.
Conclusion
The resistor is an essential component in the world of electronics for controlling the current in the circuit.
Resistance measurement using a multimeter is a fundamental skill for electronic engineers, enabling precise diagnostics, testing, and validation of electrical circuits and components.
Finding the resistance of the resistor is a simple process. You have to turn on the multimeter and connect the probes.
After probes connections, connect the probes leads to the legs of the resistor and instantly the multimeter will show the measured resistance. The resistor has no polarity so don’t worry about the probes connections.
But keep in mind this will happen when you are using an auto-range multimeter. If you are using a manual range multimeter you have to select the range before connecting the probes to the resistor leg.
This was all about the resistance measurement, I hope it will help you in learning this crucial process.
Thank you and have a blessed life…
Other useful posts:
