So you have decided to get your hands dirty with some exciting electronics projects?
But you don’t know about some of the best electronics tools and equipment you need to help you.
You don’t know what tools are needed to work with electronics, and perhaps a lot of other questions as well.
If this is the case, this is precisely what we will cover in this article.
Let’s get started.
Defining electronics tools & equipment
Electronics is a vast field. It has many sub-branches. So, it is really hard to define tools here, as I personally don’t know what you want to accomplish with electronics.
The following is an example of the various stages of an electronic project. Each stage has its required tool.
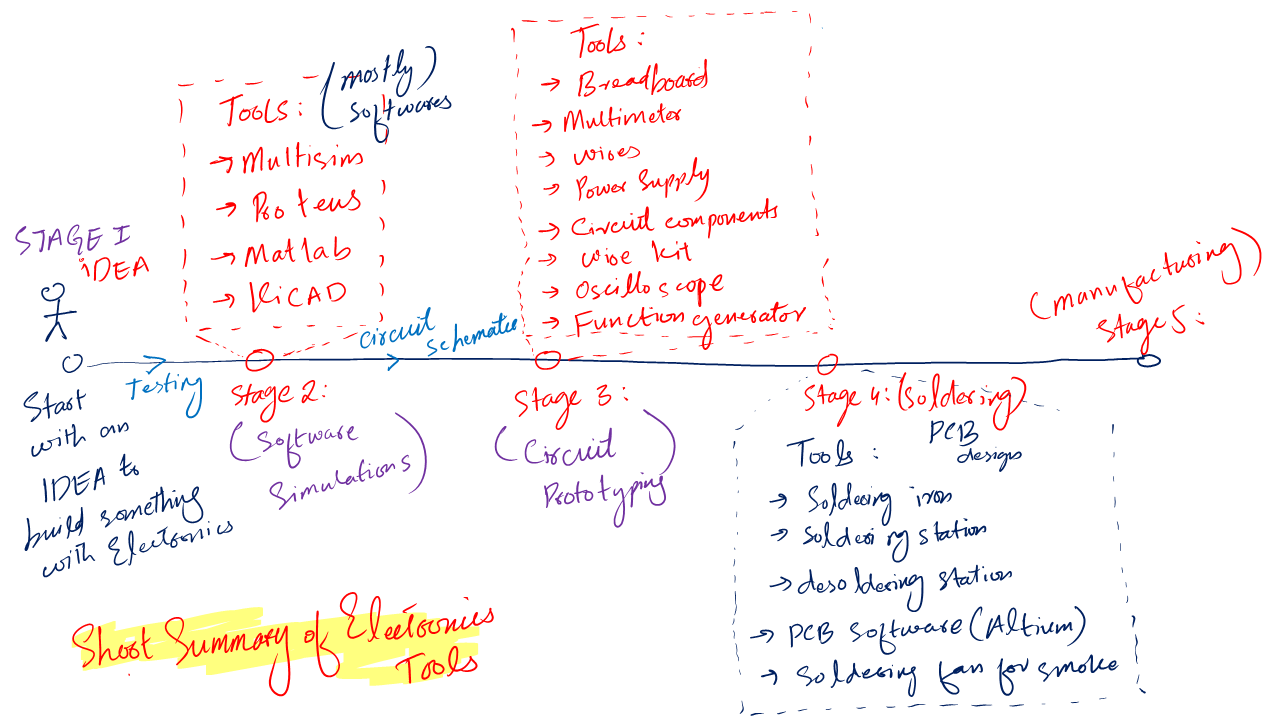
But simply, electronic tools and equipment are used to make circuits, test circuits, solder circuits, analyze circuits, troubleshoot circuits, and much more.
You know, electronics is nothing but the proper combination of various semiconductor devices to build circuits that help us create a solution for our daily or industrial problems.
And electronics tools and equipment help us just accomplish the above. So, I guess you have got a proper idea here about electronic tools.
Now, there are some best electronics tools that you much have, some you will need from time to time, and some are completely optional depending on your own unique situation.
I will first talk about the must-have tools, and we will then continue the rest of the other essential ones.
Best electronics tools & equipment – the must have
You know, just imagine you want to build an electronic circuit or project. What things will come to your mind? (take a pause and think for a while)
You know,
- First, you will need the required components to build those circuits or projects. Right? So it means your first must-have thing is an electronics components tool kit.
- Second, you will need to carefully place those components together, i.e., you will need a dedicated component placeholder. And that placeholder is the breadboard.
- Third, your circuits will have a lot of various components with various different values. To measure and place the exact component in the circuits you require a measuring device, i.e., you will need a multimeter or component tester.
- Fourth, you need to power up your circuits, i.e., you need to have a proper power supply.
- Fifth, to join various electronics components, you require wires. To work with wires, you require a special tool kit for that.
Above are the points every person, especially beginners will encounter while building any type of electronic circuit.
Now, the nature of a circuit can vary, and you may need a lot of different tools as well.
Like, if you want to analyze the input and output signals to the circuits, you need an oscilloscope.
If your circuit requires a special type of input signal, i.e. square wave or triangular wave, then you also need a function generator as well. But these are not required at the beginning stages, in my opinion.
I guess now we have a clear idea of what we want to achieve here. Let’s talk in short detail about every single tool I mentioned above.
1- Electronics Component Tool Kit
This one is very important in my opinion. Like if you don’t have proper components then how are you going to build circuits or projects? This just does not make any sense to me.
By electronics component tool kit, I mean a proper selection of various electronics components packed in well-organized boxes or bags like this one on Amazon.
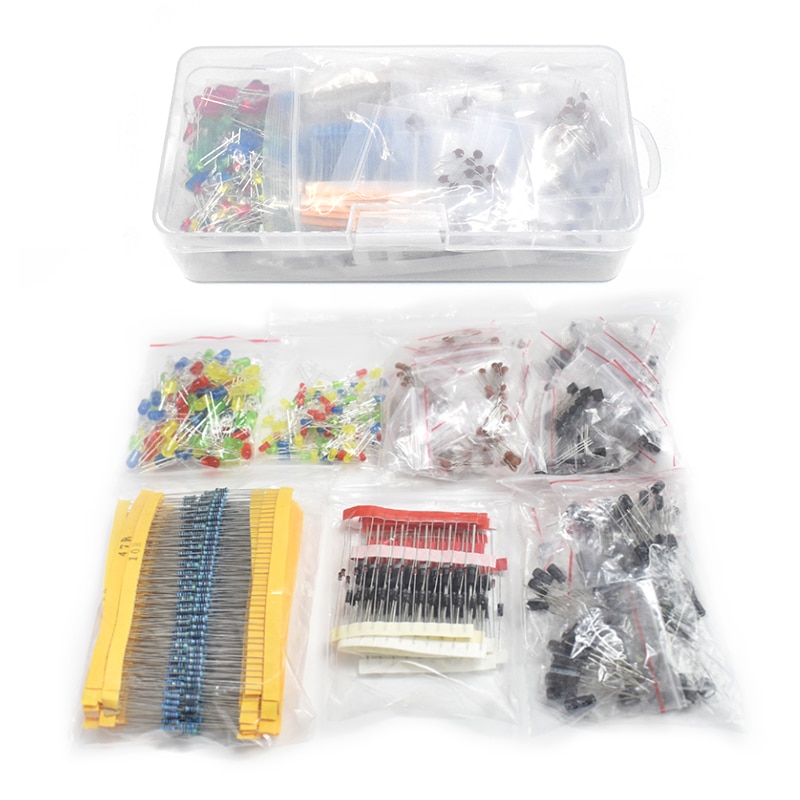
The most common use components are:
- Resistors
- Capacitors
- LEDs
- Diodes
- Transistors
- Potentiometers
- Buzzers
Of course, there are a lot of other components as well. But as a beginner, you will most probably be just working with the above ones.
2. Component Tester
The second tool we require is a component tester. A component tester helps us identify various component symbols.

It also helps to check if a component is bad or good. But more importantly, it gives us the right pin configuration of a component so that we can put it in our circuit projects correctly.
In a component tester like the m328 tester (Amazon link), you just put the component in it. And it automatically tells you the detail about that component.
3- Digital Multimeter
The third tool that every electronics person must have is a digital multimeter.

A multimeter like the above AstroAI Multimeter (Amazon link) is a basic electronic device that helps us measure:
- Resistance of resistors
- Capacitance of capacitors
- Inductance
- Continuity of a wire, PCB trace, and circuits
- Alternating voltages & currents
- Direct voltages & currents
- and much more
We also use a multimeter to troubleshoot electronic components or a complete electronic circuit.
4- Breadboard
A breadboard (Amazon link) is a tool we use all the time when making any circuit. It is like a go-to tool when it comes to building physical prototype circuits or projects.
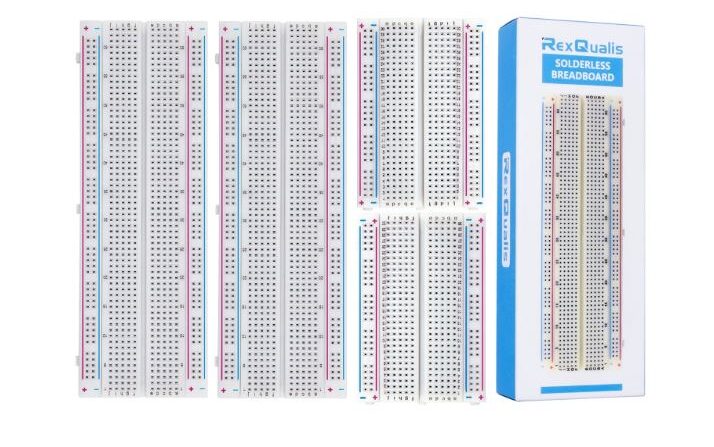
Every breadboard has rows and columns. We put our components in these rows and columns, depending on our design.
Also, we connect various components through connecting wires. In the end, we have a working prototype of a circuit.
5- Power Supply
No matter what type of circuit or project you work on. You need a power source to power them up.
You can consider a power supply as an energy supply source for our electronics projects and circuits. Without energy there will be no working circuits, that’s simple.
And that is why a decent power supply (Amazon link) is a must have tool, device, or equipment for an electronics guy’s work environment.
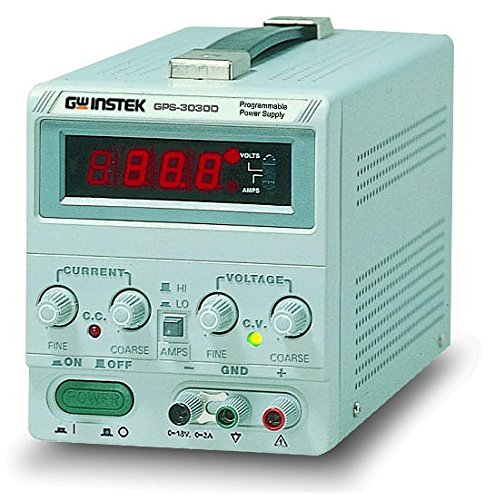
Now, if we talk a little technical here. I hope you wouldn’t mind.
The main voltages coming to our houses are alternation (you can say main AC voltage, only for your simple understanding) with an amplitude of 220Vrms or 110Vrms, depending on which part of the world you are living in.
Most electronics are DC. So you need to convert that coming AC to DC to properly power up your electronic devices.
And that is why we need to have a power supply – a simple middleman that takes on the main AC as input and converts it into DC at the output.
6- Connecting Wires
As the name is explaining itself effectively. Connecting wires are copper wires which help us connect various electronic components together in the required manner to build circuits.
Connecting wires come in various shapes, sizes, and lengths. But they all serve the main above application.
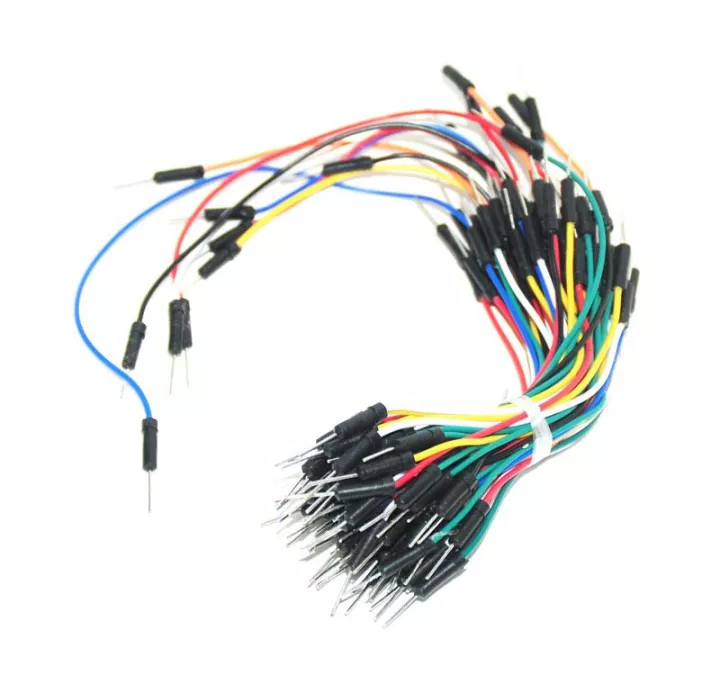
Some people also call it jumper wires, but I don’t like this term. It creates in my mind an image of a jumping wire in a circuit. Who wants such a dancing circuit? Anyway, jumper wire is the most used term, so I have to stick with it.
The above wires are perfect to work with a breadboard. But it is not necessary that you have to use them in every circuit.
Working with the above jumper wires, you will end circuit may look like the below:
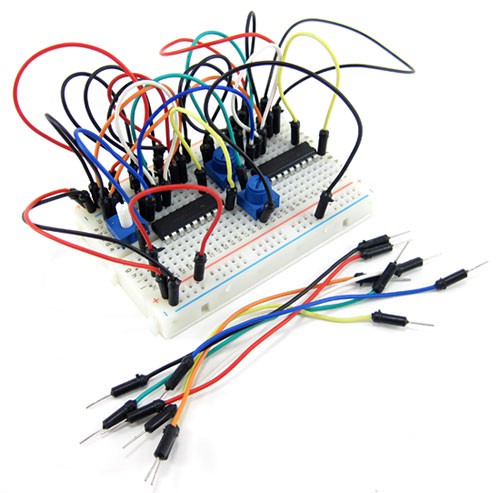
Which is good, but we can make it a little better looking. Instead, by using the above jumper wires, we can use the following jumper wires (Amazon link).
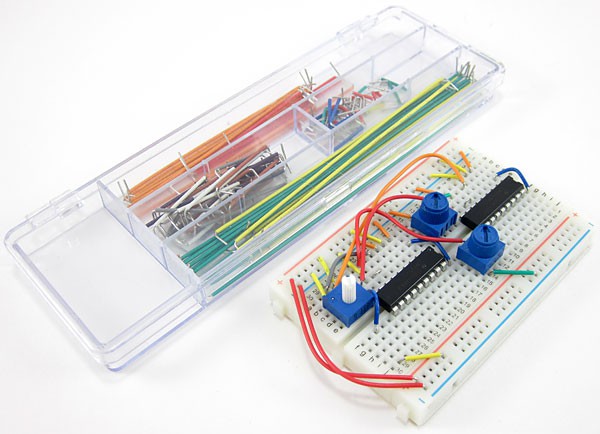
You can tell the difference yourself.
It is the same circuit, but it is not messy and looks more professional than the above one.
Remember, no matter which connecting wire you use, it does not affect the output of the prototype circuit.
Now, the first discussed jumper wires come with fixed length and fixed open terminals. However, the latter discussed ones don’t come that way.
You have to cut them according to your situation. To properly handle these wires, you need a proper wires tool kit, as discussed below.
7- Wires Tool Kit
By now, you should know why we need a wires tool kit. You know, when I was a student, I didn’t have a lot of money.
I bought only a wire cutter and a wire stripper like this one (Amazon link). These two tools just work fine for almost all of my work.
So, if you are a student or beginner, I would say you only need these two basic tools. But you can afford it, so why not have fun with amazing tools and gadgets?
Alright!
The above are the must have electronics tools if you are just starting out with electronics.
Now let’s see what other tool we have.
Electronics tools for circuit idea testing
In general and in electronics as well everything begins with an idea. You got an idea to create something with electronics. Great! Now, what next?
Usually, ideas come in raw form. It is not always clear at the beginning what you want exactly and how you are going to achieve it.
So, there are two ways you can perfect your electronics idea.
First, you can grab some components which you think might work to achieve what is in your brain.
You play with it, burn a lot of components, may get frustrated, and maybe lose quite some money as well.
It is very dangerous to go with this method as it involves electricity and hence you are testing a lot of things out of nowhere – there is a good chance you will harm yourself.
And I am saying this from my own experience. 🙂
Secondly, you just download simulation software and test your ideas there – simple as that.
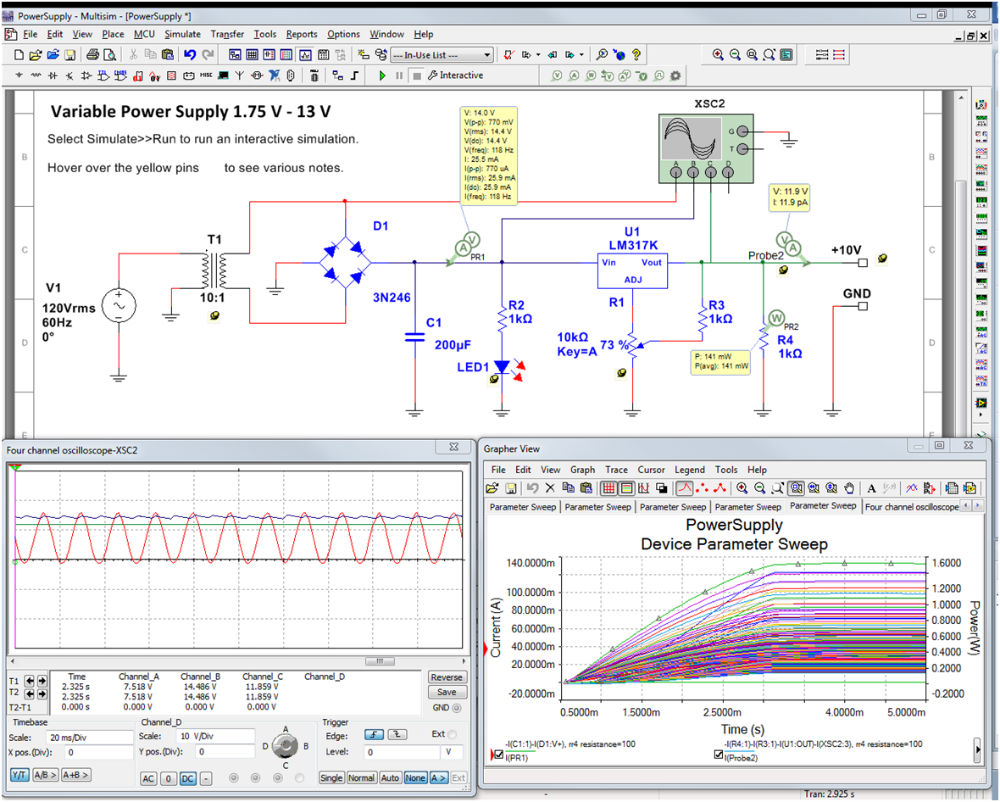
Following are the simulation softwares I personally use and find very easy. They all have student versions for free. Or you can get access to them from any engineering college.
- Multisim (online free version)
- Proteus
- Matlab
- KiCad
These are the best electronics tools you need to have when testing or creating your own circuits.
And you should always work on your own ideas instead of me talking to you or giving you projects.
Best electronics tools for circuit prototyping
Circuit prototyping is making a circuit from a circuit schematic (you can say a circuit drawing) to actually test it in a physical environment.
Circuit schematics come from most of the above mentioned simulation softwares.
If you closely see the electronics tools summary diagram I have shared at the very beginning of this article. You will see circuit prototyping is the second stage of any electronics project.
Some of the tools we need for circuit prototyping are already discussed in the must-have section, i.e. they are:
- Electronics Component Tool Kit
- Multimeter
- Breadboard
- Wires
- Wires tool kit
- Power supply
Besides the above, we occasionally also need some other tools as well. They are oscilloscopes, function generators, and a few others.
1- Oscilloscope
Circuits are mostly of two types, i.e. analog and digital circuits. Analog circuit works with continuous signals while digital circuits work best with digital signals.
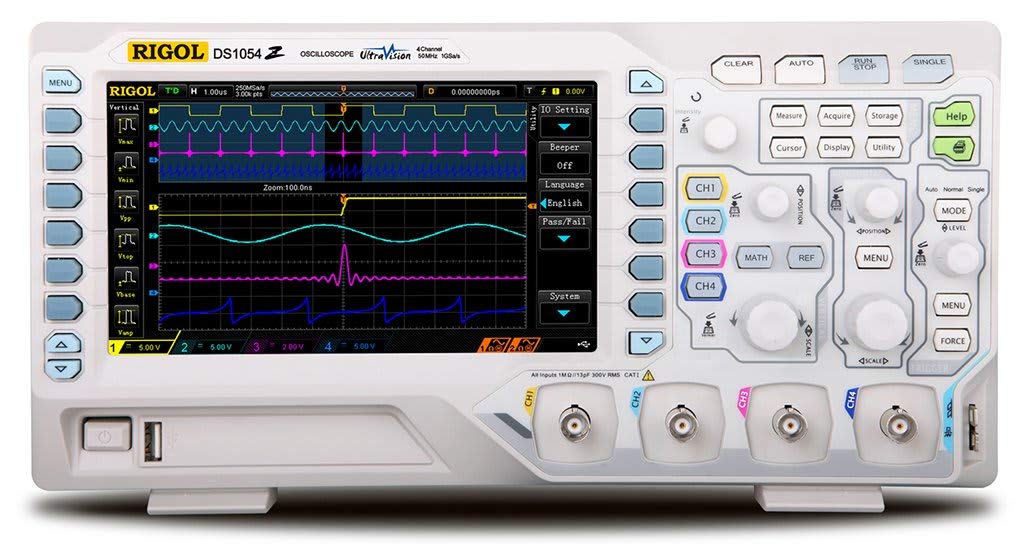
To study the behavior of both circuits at the output side we need a tool to visually help us see the signal, and analyze and measure its various parameters.
The tool which helps us achieve the above is called an oscilloscope.
With the help of an oscilloscope like the Siglent Technologies SDS1202X-E (Amazon link), we can draw the signals. We can add them. We can see if there is any noise in the circuit.
2- Function Generator
While working with electronics as I said you will mostly work with analog and digital circuits.
Sometimes these circuits require different shapes and amplitude signals at the input to work properly.
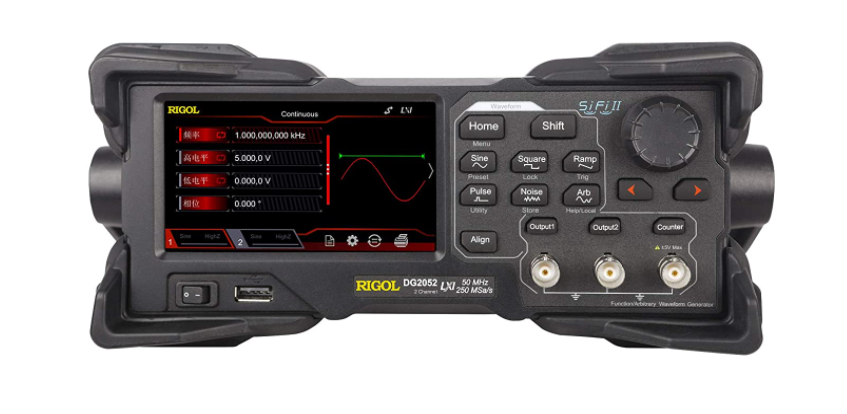
To help us generate various shape and amplitude signals we need to have a function generator.
To help you easily remember this device you can also call it a signal generator. You can learn more about this tool in this article (click here).
Electronics tools for circuit soldering & desoldering
Circuit soldering is one of the amazing things to do in electronics or maybe it is just me who thinks it this way.
With circuit soldering, you actually connect components permanently. It is the third stage of any electronics project.
In this stage, your circuit prototype becomes like a professional piece of device that you can market or take to the investor pitches for a potential startup.
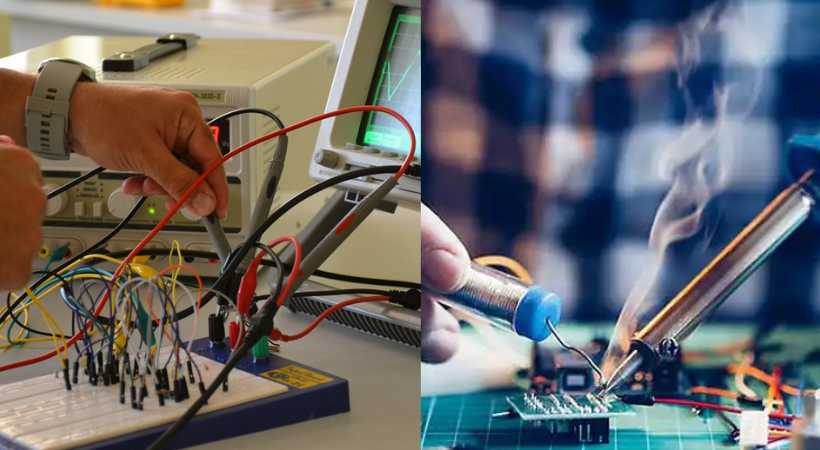
Now, you cannot limit soldering to just converting prototypes to permanent boards.
You can also do soldering to repair old boards (the technical name for boards is Printed Circuit Boards, PCBs) as well.
The opposite of soldering is desoldering. Desoldering is done when a component is burnt out in a PCB, and we want to replace it.
Following are some of the best electronics tools that will help you in your soldering and desoldering work.
1- Solo soldering iron
A soldering iron is a tool that gets heated when turn on. It helps us melt the soldering wires to make a circuit joint.
The joint combines the electronics component terminals and the PCB board according to the precise arrangements required.
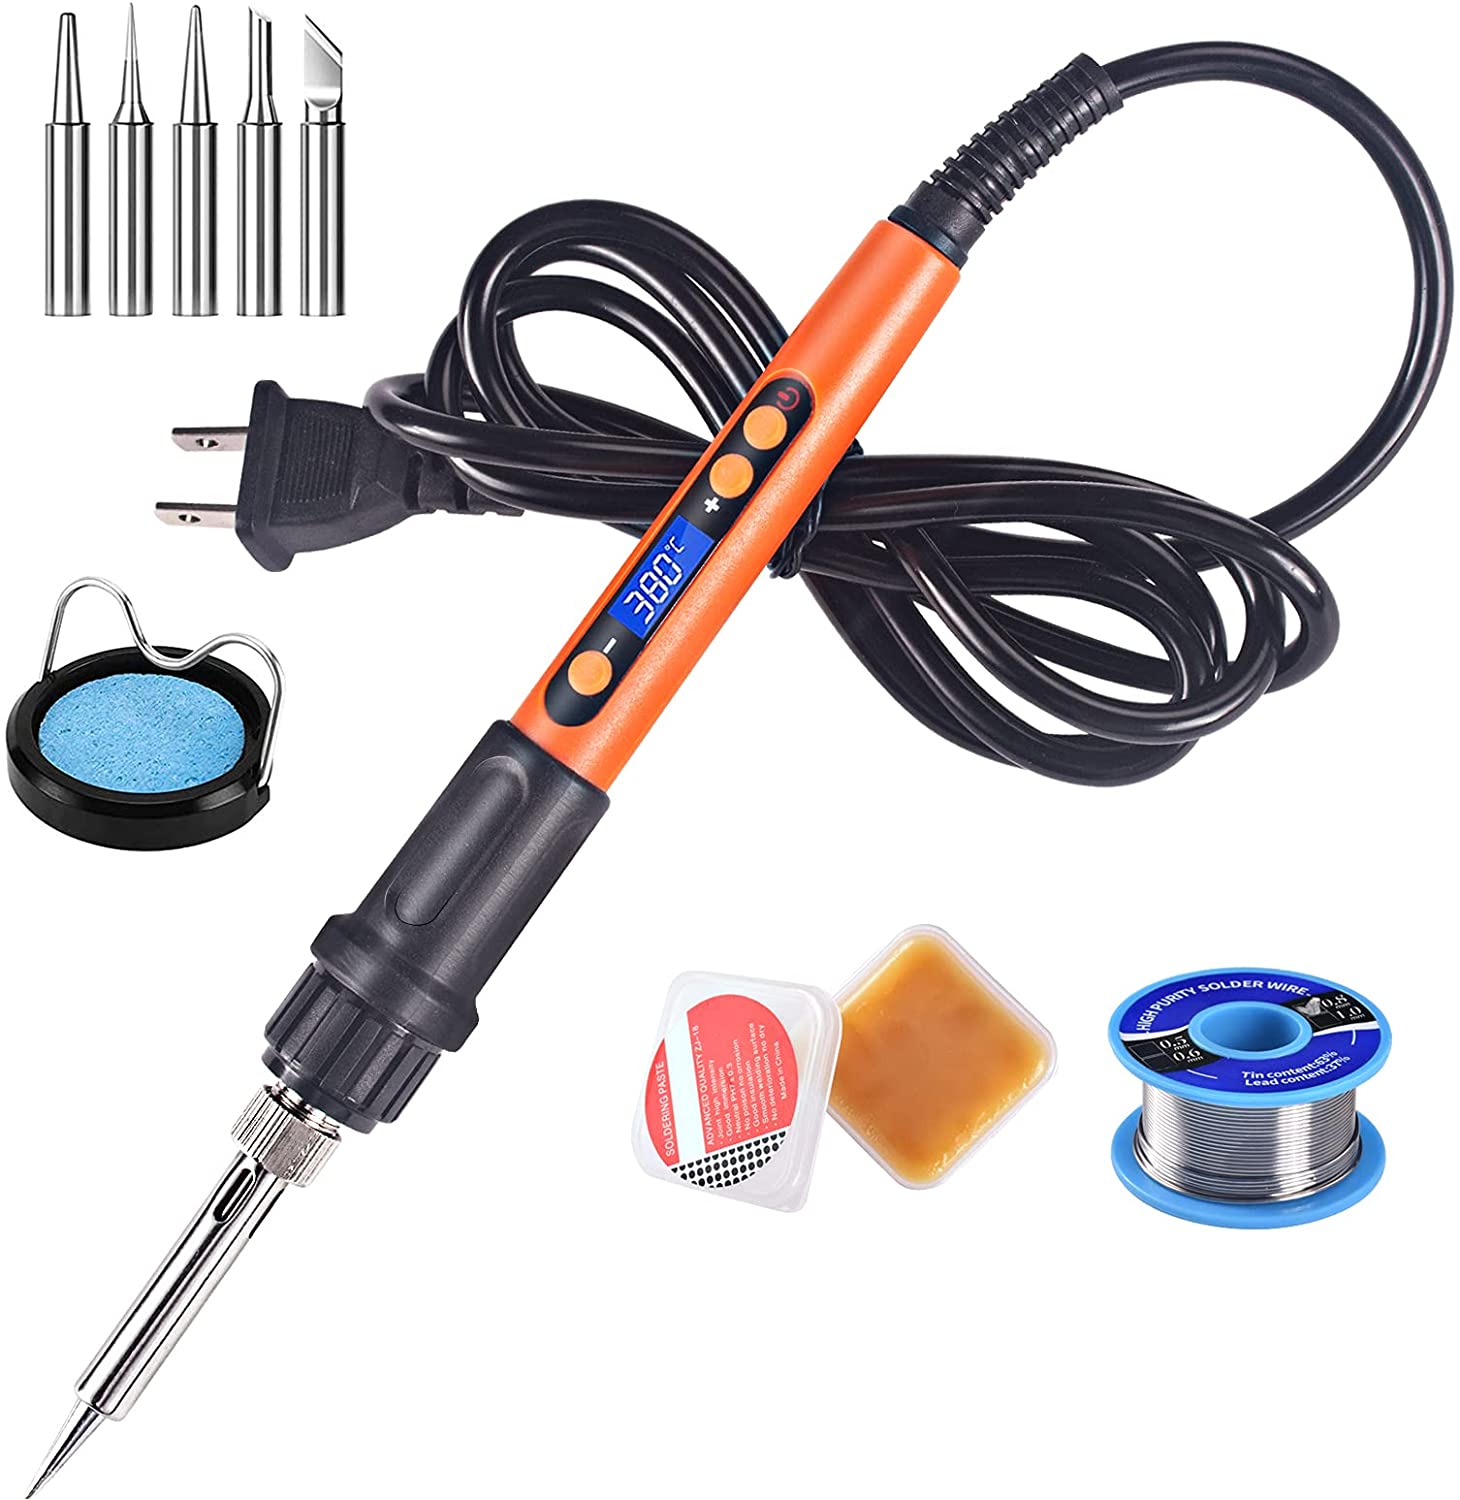
Soldering iron comes in a lot of shapes and sizes but its main purpose remains the same.
The noticeable thing about soldering iron is its wattage. It is rated in Watts.
Usually, a lot of electronics components need different levels of heat temperature. So it is always good to have a soldering iron with variable heat levels i.e., have a heat control mechanism. For example the famous Hakko soldering iron.
2- Paste
Soldering paste helps us to create a connection between the components terminals and board surface (technically speaking, the PCB pads).
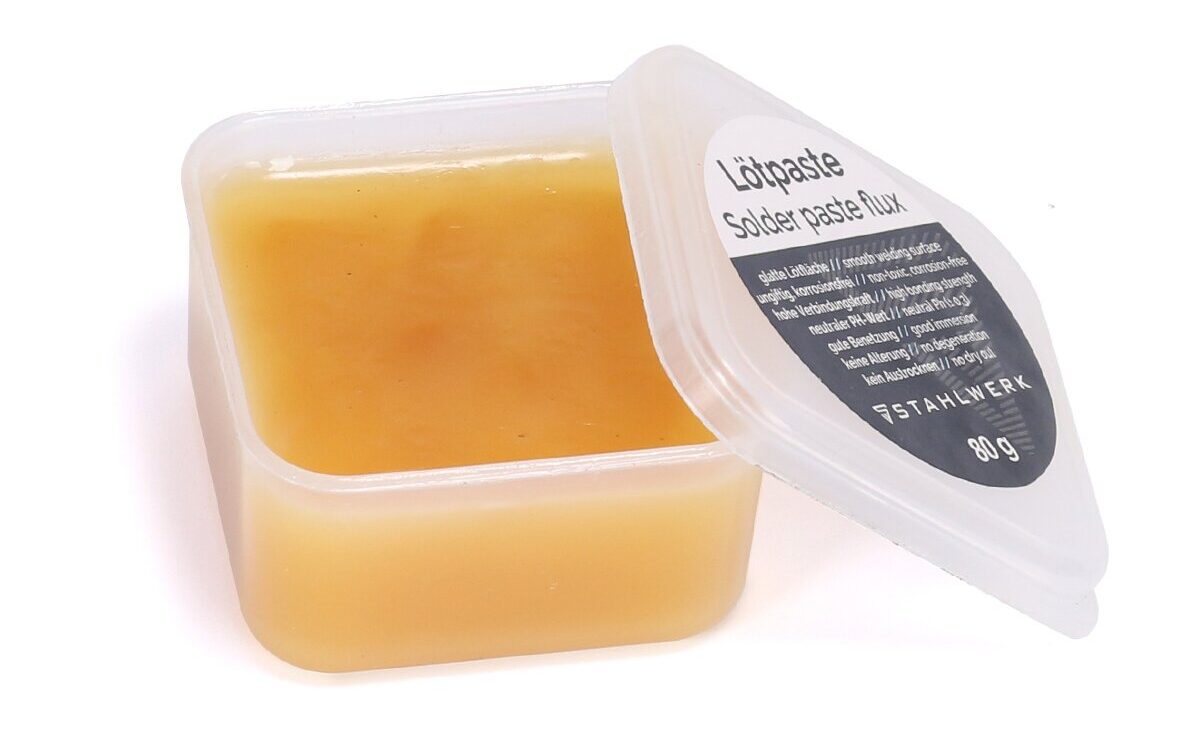
Good soldering is must have when it comes to soldering circuits or preparing them
3- Wire
Soldering wire melts under the heat from the hot soldering iron and fixes the PCB surface or pads to the terminals of electronics components (components maybe two terminals or 16 terminals).
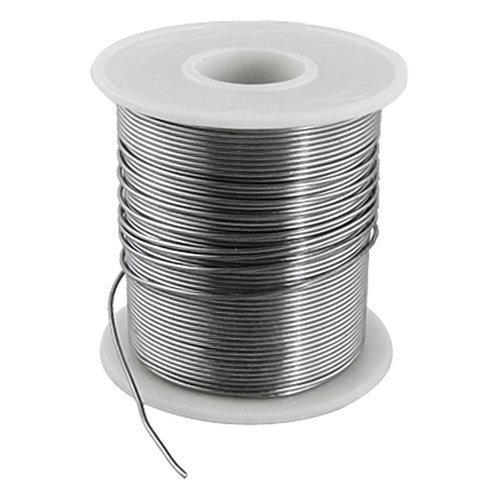
Soldering wires comes in various thicknesses. You should choose the one best for your projects.
We cannot fix the use of the soldering to just circuits. We can also solder two wires together or in general, we use soldering to bond metal workpieces together.
4- Tip cleaner
This is self-explanatory. You know, when you are using a soldering iron for quite some time its tip gets dirty with the remaining soldering wires here and there.
We need something to clean that up so that we can continue with our soldering work.
And that is when soldering tip cleaner comes in handy.
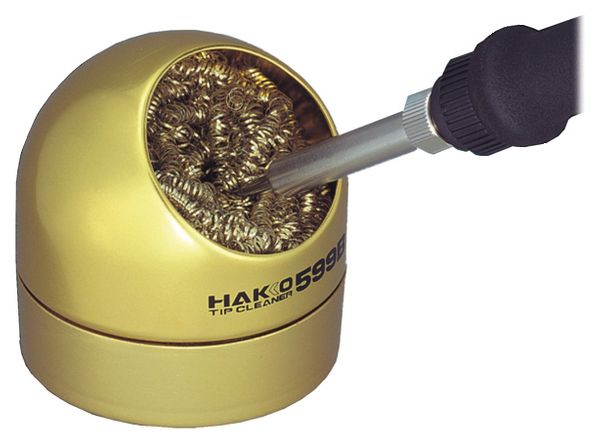
Tips cleaner comes in a lot of variations. You can use sponges as well but I really like a brass cleaner.
5- Soldering paste sucker
We are not living in an ideal world. It is not like you will always do the right soldering all the time.
In fact, right soldering will be a thing you will rarely do when just getting started. Even if you are professional you will make mistakes.
By mistakes, I mean you wrongly solder a component or just shorted the PCB traces. In any case, we need a tool that can help us desolder the wrong component so we can resolder it correctly.
And the name of such a tool is Sucker.
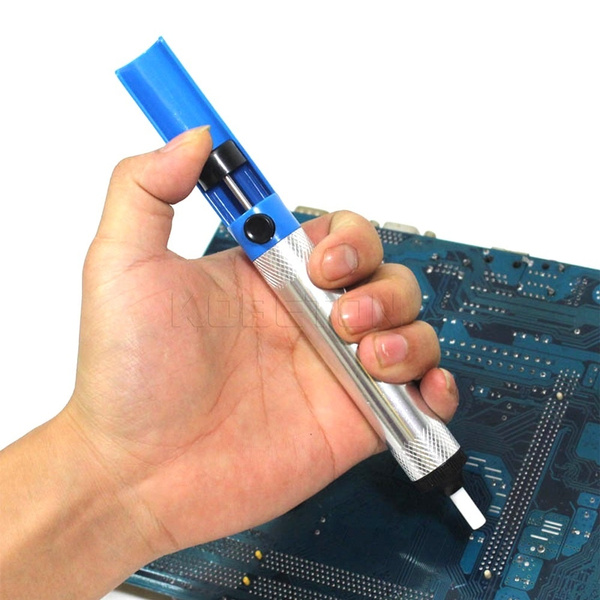
You put a hot soldering iron on the wrong connection. You wait until the soldering wires meltdown. Once the soldering meltdown you just suck that up using one of the best electronics tools i.e., soldering paste sucker.
6- Soldering station
The above soldering tools have their own benefits and come in handy in their unique situations.
But when you are working with various electronic boards the above tools are not very efficient and we need something reliable.
The need for reliability is very important. To fulfill this need we need to have dedication soldering station.
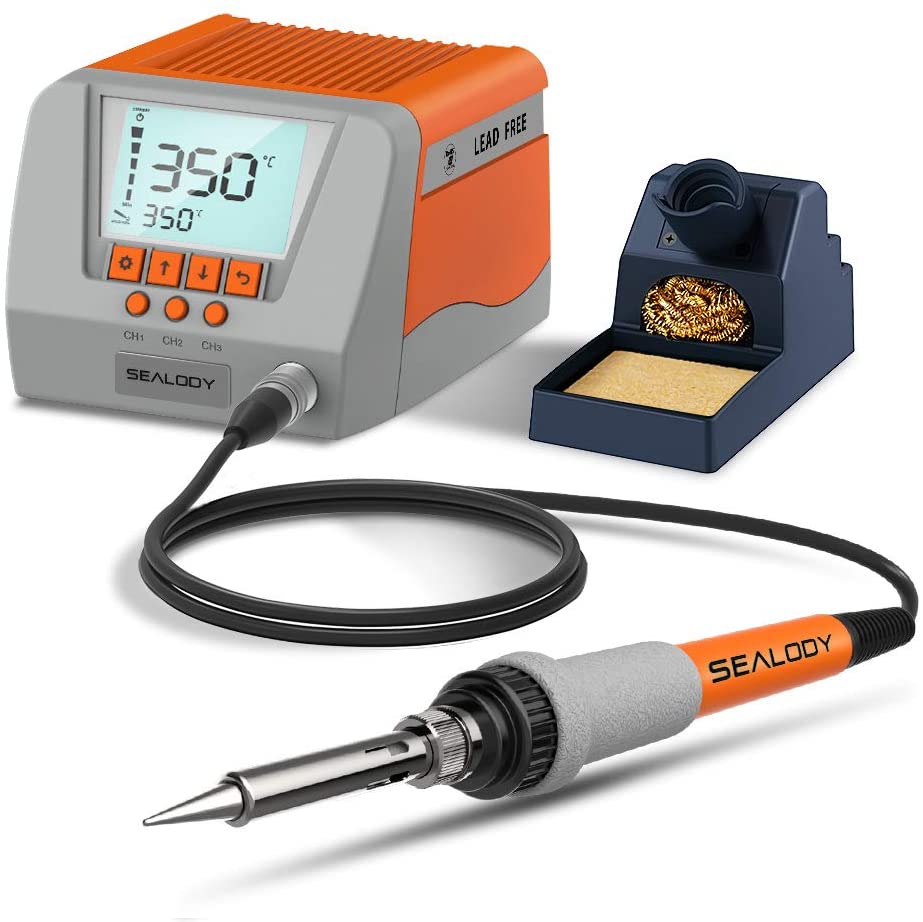
The soldering station like the Weller Station gives us control over temperature. We can control the temperature of the soldering iron tip with it.
Also, it comes with everything we need to have proper soldering work. The only downside is, that soldering stations are a little expensive.
7- Desoldering station
Opposite to soldering station is desoldering station. In electronics especially in electronics repair, you need to desolder so many bad components.
To do the desoldering work reliably we need a reliable high-quality desoldering station in our labs as well.
Desoldering station comes in the shape of guns called desoldering guns. You can see the following station from Hakko brand.
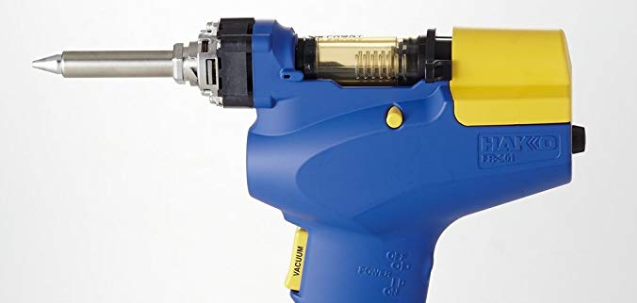
You just put the desoldering gun tip on the terminal(s) of the component, press the button, and it sucks out the soldering wire.
8- Hot-air rework
You know, there are two types of components in electronics.
Type one are the through-hole components i.e., they have thick terminals (you can say for understanding, the legs of components) of various lengths.
We solder such components through the holes of a PCB board.
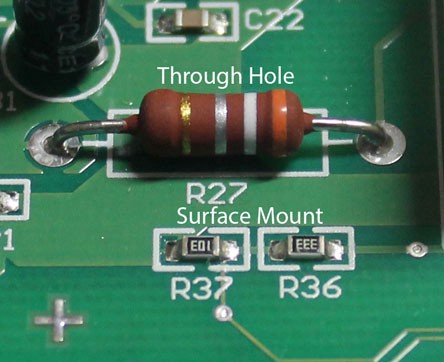
The second type is SMD i.e., surface mount device. As the name is telling you the whole story – such components are mounted on the surface of PCB boards.
Now to work properly with through hole components we use a soldering station as discussed above.
But to work with SMDs we need another reliable type of soldering machine called the hot air rework.
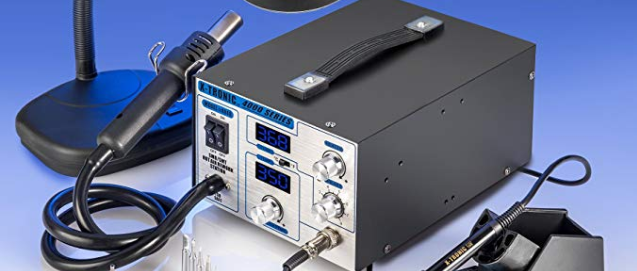
The hot air is due to its function – it blows hot air which melts down the soldering wire across the terminals of any SMD.
Conclusion on best electronics tools
In short summary, I can say that – to work properly with electronics you should have the best electronics tools and equipment in your lab.
Some of the best electronics tools are the following you must have:
- Multimeter
- Power supply
- Component tester
- Breadboard
- Jumper wires
- Jumper wires tool kit
The above are must for a beginner person but if you want to analyze circuits on a deeper level you will need the following tools as well:
- Oscilloscope
- Function generator
But the story doesn’t end here. Rather than these tools you also need simulation software to test your ideas and create circuit schematics that you can easily use in your lab.
Some of the famous simulation software are:
- Multisim
- Proteus
- KiCad
- Matlab
The above all mentioned software and tools help us to work properly when building circuit prototypes. But we also need special tools when we want to solder or desolder various electronics components on PCB boards.
The tools need for soldering and desoldering are the following:
- Soldering iron
- Soldering paste
- Soldering wires
- Tip cleaner
- Sucker
- Soldering station
- Desoldering station
- Hot air rework
- PCB layout creating software such as Altium.
In a very quick summary for your reference – use the following diagram. It might be of great use to you.

This diagram is not perfect, nor I am. But this article about some of the best electronics tools is my little knowledge based effort to help you out.
I hope you enjoyed it.
Now it is your turn. Please share in the comment section which tool you find interesting and would like to try first. Also, share this article with your friends, it helps me a lot.
Thank you so much and have a great life.
Other useful articles:

Thank you for your helps,and i want to more know.Please helpsme
Welcome 🙂
This is one the most helpful articles on getting started. Thank you.
Welcome 🙂
Good job. Thank you
Welcome 🙂