
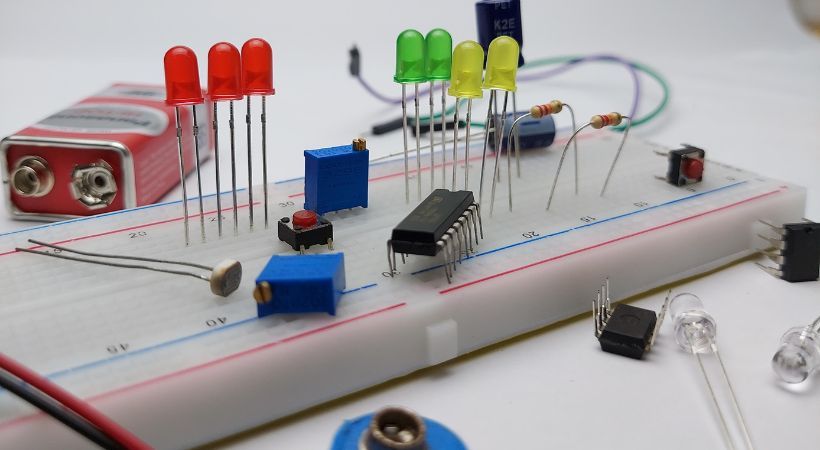
A breadboard is used for prototyping various electronic circuits to test and modify the circuit if needed.
As beginner mistakes can happen, the common breadboard mistakes are incorrect component placement, connecting a power source to the wrong portion of the breadboard, not pushing the component properly into the breadboard holes, placing the integrated circuit in the wrong place, and not understanding the breadboard layout.
These are some common mistakes, so in this article, we’ll discuss the breadboard mistakes to enable you to work with it effectively.
Breadboard mistakes
In electronic circuits, tools like breadboards hold significant importance. It allows you to check the behavior of the circuit before making the permanent connections.
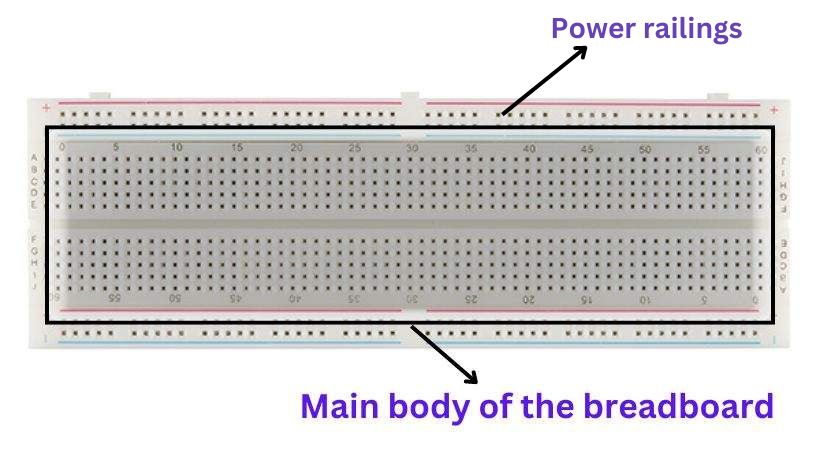
The breadboard is made up of holes that are arranged in different rows and columns. The component pins are placed in these holes to build a circuit.
It has separate portions for power and component connections, which makes it easier to differentiate between power and components connections.
Breadboards come in various sizes and are commonly used in electronics education, hobby projects, and engineering design.
When using a breadboard, there are several common mistakes that beginners and even experienced users can make.
Understanding these mistakes can help in troubleshooting and ensuring that your circuit works correctly.
Here are some of the most common breadboard mistakes:
1. Wrong component placement
One of the most common mistakes that might occur is placing components in the wrong spot on the breadboard.
For example, if you place the integrated circuit (IC) into the main area of the breadboard, this will shorten its pin and damage the IC.
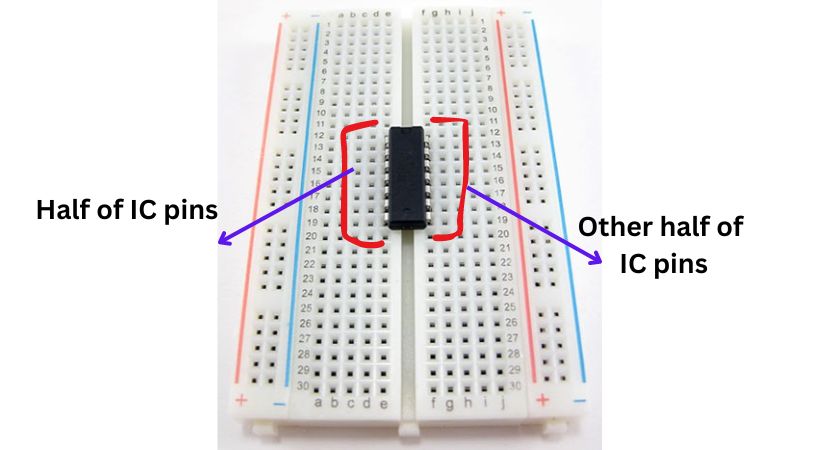
Place an Integrated Circuit (IC) across the middle gap of the breadboard, and make sure the pins on one side are connected to the left side of the gap and the pins on the other side to the right side.
Another example of wrong component placement is suppose you want to put the resistor in columns 12 and 13 but put one end of the resistor in column 12 and the other end in column 15, this will disturb the overall circuit performance.
Carefully look at the placement before testing a circuit.
2. Poor connections
Not pushing the component pins property into the holes or removing the components frequently from the holes leads to poor connections because the holes become loose.
If you are building a simple LED, an LED might not light up because its connection is poor or you have damaged holes or LED pins by removing them frequently.
Proper and reliable connections are a necessary thing for the functionality of the circuit; make sure the connections with the breadboard are correct and strong.
3. Incorrect power connection
Connecting the power source such as a battery or power supply incorrectly. As a beginner to the electronic circuit and breadboard, this mistake is common.
All breadboards have power rails on the top and bottom, but on some breadboards, the power rails are split in the middle. You connect power to the top half and, after connecting components on the breadboard, take power from the other half of the top rail.
Do you just assume what will happen? The circuit will not work because it is not getting any power. So, always pay attention to the breadboard power rails.
Another power connection mistake is connecting power source terminals incorrectly. Connecting the positive to the negative of the breadboard and the negative to the positive of the breadboard.
This will damage the components due to reverse polarity.
4. Short circuit
An unintended connection or low resistance path for current to flow is called a short circuit.
Suppose you have two wires that accidentally touch each other due to poor routing. This could create a short circuit, causing the power supply to overload or components to burn out.
Ensure that wires or component pins do not accidentally touch each other, causing a short circuit.
5. Damage to the components
Applying a higher voltage or current than a component’s rating can damage it. Mishandling of the components also causes damage to the components.
If you connect a 12V battery to an LED without connecting a limiting resistor across it, the LED will burn out. This makes it necessary to learn the component ratings.
Bending leads and applying too much force on the component while inserting them into the breadboard leads to component damage.
Gently handle the components and understand their ratings.
6. Misunderstanding of breadboard layout
If you have a breadboard with multiple sections not connected internally, failing to connect them with jumper wires can lead to parts of your circuit not receiving power.
All breadboards don’t have a continuous power rail; use the multimeter to check the power distribution on the breadboard. Understand how the breadboard holes are connected.
Layout misunderstanding can cause the circuit to not perform as intended.
Tips for a better breadboard experience
Here are some general tips that will help you in effectively designing an electronic circuit.
- Visualize where you will connect different components before placing them on the breadboard.
- Build your circuit step by step, checking each part as you go.
- Use a multimeter to regularly check the connections and component values.
- At each stage, test the circuit. This is an essential step as it makes it easier to identify and correct the mistake.
- Keep notes on your circuit design and any changes you make during the building process.
By following these steps, you will minimize the mistakes and will get a better breadboard experience.
Conclusion
A breadboard is an essential tool for electronic circuit prototyping. The solderless feature makes it an excellent option to test and modify the various circuits.
When working with a breadboard, you may face different challenges or make many mistakes. Don’t worry; take those mistakes as a part of the learning process.
The common breadboard mistakes are:
- Placing the components on the wrong area of the breadboard
- Making loose or poor connections of wires and components
- Connecting the power source incorrectly
- Causes the short circuit by connecting two wires or components pin
- Damaging the components by ignoring their ratings and mishandling them
- Not understanding the breadboard layout properly
Take steps to avoid these mistakes, you can improve the reliability and functionality of your breadboard circuits.
If you are a beginner, remember, practice makes perfect, and with a little experience, you’ll be a breadboard pro in no time!
This is it, this was all about the common breadboard mistakes.
Thank you, and stay blessed…
Other useful posts: