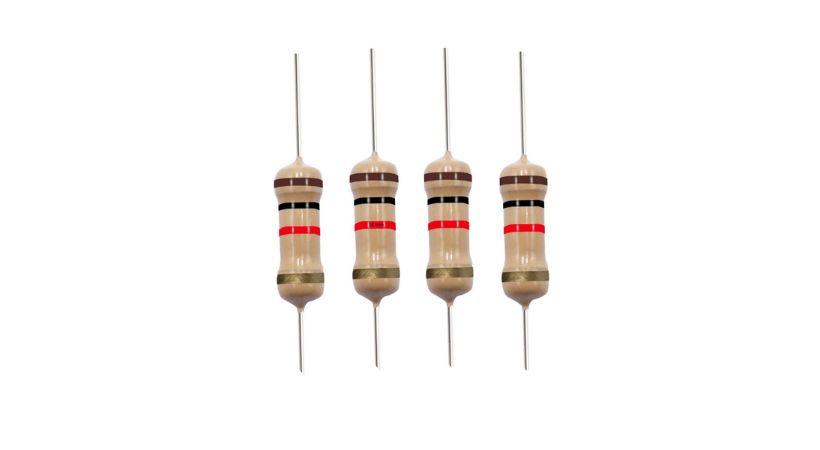
The resistor in the circuit is used to control or regulate the flow of current. To ensure that the connected load doesn’t damage with overflow of current.
To use resistors properly, select the appropriate resistance value and power rating based on your project needs. Ensure the resistor can handle the required power to prevent overheating. Use proper soldering techniques to avoid damaging the component, and test the resistor in the circuit to check for any overheating issues.
In this article, let’s learn how to use resistors in a circuit and what safety measurements should be considered while connecting resistors.
Resistor usage properly
A resistor is a basic electronic component used to impede or restrict the flow of current in the electronic circuit. The resistor has a specific resistance value, which is measured in Ohms (Ω).
The function of a resistor is to convert electrical energy into heat energy by dissipating power.
When current flows through a circuit and passes through a resistor, it encounters resistance, resulting in the conversion of electrical energy into heat energy.

This property allows resistors to be used for applications such as current limiting, voltage dropping, and signal conditioning.
There are different color bands printed on the resistor which indicates resistance value. You can identify resistor values using color bands.
Mathematically, the relationship between resistor (R) voltage (V), and current (I) is described by Ohm’s law.
The formula for Ohm’s law is:
R=V/I
Various types of resistors are available in the market in different shapes and sizes. You can check out our article on the basics of resistors to learn more about it.
Now the question is how to use resistors in a circuit. To use a resistor in a circuit properly you have to consider some key factors.
Here’s a detailed explanation of how to use resistors in a circuit effectively.
1. Determine the circuit requirements
The first step is to determine the requirements for your specific application like what value and power rating resistor is required. This can be done by analyzing the circuit demands, voltage levels, and current flows.

After analyzing the circuit you can find the resistor value using Ohm’s law. This is one of the essential steps because selecting the wrong value of the resistor can affect the functionality of the circuit.
2. Select the right resistor
The second step is the selection of a resistor. Once you know the required circuit requirements and resistance value, you need to choose a resistor within the value close to the desired resistance.

In various standards, such as 1Ω, 10Ω, 100Ω, or 10kΩ, etc. resistors are available. When one resistor is not sufficient, you can also use different combinations of resistors to achieve the desired resistance.
3. Determine power handling capability
The resistor’s Power rating can determine its power handling capability. Power rating specifies the maximum amount of power it can safely dissipate without getting damaged.
For the resistor you select for your project, make sure that it has a higher power rating than the power dissipation in the circuit.
For calculating power dissipation, you can use different formulas such as P= V^2/R or P= I^2*R.
4. Placement of resistor
Once you select the appropriate resistor for your project, you must connect it to the circuit.

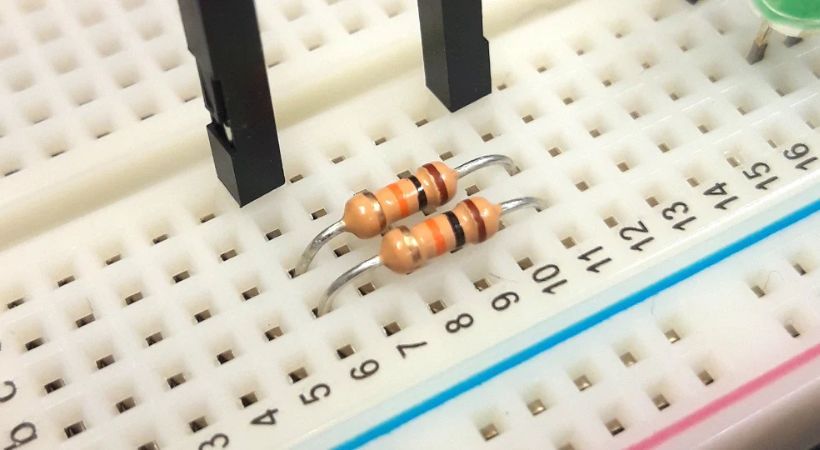
If you are working with a breadboard, locate the resistor position on the board and insert the resistor’s pins into the holes.
Resistors can be connected in the circuit in various combinations, such as series or parallel. For instructions on connecting resistors, refer to the circuit diagram.
5. Analysis and Testing
The resistor heats up during operation. It is important to ensure that it does not overheat, as excess heat will affect its performance. Also, monitor the resistor’s temperature to ensure it remains within an acceptable range.
After connecting the resistor to the circuit, analyze and test the circuit performance. Measure the voltage across the resistor and the current flowing through it to verify that they align with your calculations and expectations.
Adjustments may be necessary if the measured values significantly deviate from the predicted results.
These tips can help you use resistors in electronic circuits efficiently while maintaining proper functionality and durability.
Resistor safety measurements
Similar to any other electronic components, resistors need to be operated properly and safely, hence they need to be protected from specific risks.
The following are some standard safety precautions to take when handling resistors:
1. Power rating
The resistor dissipates power when connected to the circuit. Power ratings indicate the maximum amount of power they can dissipate without being damaged.
Overloading a device can result in component failure, overheating, and even fire hazards. Make sure the resistors you choose have a power rating greater than the circuit’s total power dissipation.
Resistors with appropriate power ratings prevent excessive heat generation and safeguard their functionality.
2. Consider voltage ratings
The resistor can endure a set range of voltage. This set range of voltage is defined by voltage rating. Exceeding voltage from these ratings can lead to breakdown or overall system failure.
Make sure that the voltage across a resistor is always kept within its designated rating. A resistor should be chosen whose voltage rating is appropriate for the highest voltage that your circuit will experience.
Consider the voltage rating and other factors that may affect the resistor performance.
3. Avoid overheating
Proper heat dissipation is essential for resistor safety. To provide appropriate ventilation and heat dissipation, leave enough space around the resistors.
Avoid placing the resistor near heat-generated components and always monitor resistor temperature during operation.
If the resistor becomes very hot and changes its color, this is a sign that the resistor overheats and is operating beyond the power rating.
4. Soldering precautions
Using proper soldering techniques is essential for connecting resistors in the circuit. Don’t overheat or overstress the resistor while connecting it to the circuit, as it will lead to damage.
Use an appropriate soldering iron temperature and soldering time to ensure reliable connections without harming the resistors. Make sure you store the resistor in the proper place.
5. Careful handling
Resistors should be handled carefully, particularly if they contain thin leads or fragile surface-mount components.
The leads should not be bent or overstressed as this could compromise their mechanical integrity or electrical connection.
Conclusion
The Proper functionality of the resistor is essential for the reliable and safe operation of the circuit.
To use a resistor effectively, you have to determine the requirement of your project first, after this select the correct resistance value. Also, keep an eye on the power handling capability of the resistor.
When finally you are confident that the selected resistor is right, place it into the circuit. At last, analyze and test the resistor performance.
Considered the power rating, avoid overheating, apply the proper soldering technique, and carefully handle the resistor while working with it. All these safety measures ensure the safe and proper functionality of the resistor.
This is all about how to use resistors in a circuit, I hope it will be helpful.
Thank you and stay blessed…
**We learned how to properly use a resistor. Let’s have a fun activity to find out resistors on a breadboard
