LEDs testing: Know if LED is good or bad (2025)
If you are new to electronics or DIY hobbyists, how to test LED is a fundamental skill.
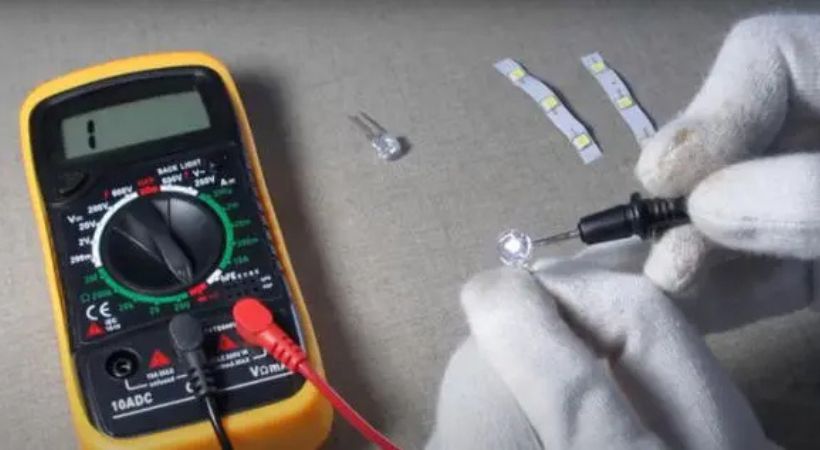
To test an LED, you will need a digital multimeter that is in diode mode. Identifying the polarity of LED is crucial while testing it. Connect the positive lead of the multimeter to the positive terminal of the LED and the negative lead to the negative terminal of the LED. If the LED turns ON it means the LED is perfectly working. Another way of testing an LED is visual inspection and the use of a components tester.
In this article, we will walk you through the LED testing process step-by-step, ensuring accurate results and safe practices.
LED testing
LED is the type of diode that emits light when voltage is applied. It comes in different shapes, sizes, and colors.

LEDs are widely used in various electronic devices and applications due to their energy efficiency, compact size, and long lifespan.
It is used as an indicator such as power, status, and faulty indicator in different electronic devices, and can be used to transfer data in optical communication.
Testing LED is essential to find out if it working perfectly or not.
There are various techniques for the LED testing, but let’s start by talking about safety measures that need to be taken while testing LEDs.
Safety precautions for LED testing
Safety always comes first. When testing LEDs, it’s important to follow certain safety precautions to protect yourself and the equipment involved.
Here are some key safety measures to keep in mind.
1. Disconnect power
Disconnecting the power is the first thing you have to do if the LED that has been tested is connected to the circuit. If the power is not turned off it can cause electric shock and short circuits.
To minimize the risk of short circuits and electric shock, it is crucial to disconnect the power source or turn it off before testing an LED.
2. Polarity check
LED is a polarized electronic component, meaning they have specific positive (anode) and negative (cathode) terminals. For testing, you have to identify the polarity correctly.
Reversing the polarity can affect the LED’s performance, prevent it from lighting up, or potentially damage it.
Typically, the longer lead of the LED corresponds to the positive (anode) terminal, while the shorter lead or flat side of the LED corresponds to the negative (cathode) terminal.
3. Proper handling
LEDs are delicate electronic parts, and handling them incorrectly might cause harm.
It’s crucial to handle LEDs carefully and to avoid using too much pressure or force.
Steer clear of violently bending the leads or putting them under physical strain that can break them. Handle the LEDs properly while testing them.
4. Use multimeter safely
The multimeter is the most common tool used to measure current, voltage, and resistance. Using the multimeter in the correct mode is essential for LED testing.
When testing the LED using the diode testing mode on the multimeter, it typically applies a small current to the LED and measures the voltage drop across it. This mode helps determine the LED’s polarity and assess its functionality.
Take care when connecting the multimeter to prevent unintentional short circuits or contact with active circuits. Make sure the LED leads or terminals are correctly connected to the multimeter probes.
LED testing methods
Let’s discuss the methods for testing LED in detail.
1. Visual inspection
Visual inspection is the first method for testing and analyzing LED performance.
Visual inspection of an LED involves carefully examining the physical appearance of the component to assess its condition and identify any potential issues.
Here are some common visual indicators that an LED may be damaged:
- Visible cracks, chips, or other physical damage on the LED’s casing or lens.
- Changes in color or uneven color distribution in the LED.
- Dark spots, burn marks, or discoloration on the surface of the LED.
- The broken, bent, or damaged leads of the LED.
- Irregularities in the shape or size of the LED compared to its original design.
- Absence of solder or visible damage to the solder joints connecting the leads to the LED.
A careful visual inspection of these aspects can provide valuable information about the condition of an LED. If any of these signs are observed, it may be advisable to replace the damaged LED.
The visual inspection of LEDs helps you maintain the integrity and functionality of LEDs in electronic devices and systems.
2. Using a multimeter
Testing an LED (Light Emitting Diode) with a digital multimeter involves using the diode test mode or continuity mode on the multimeter.
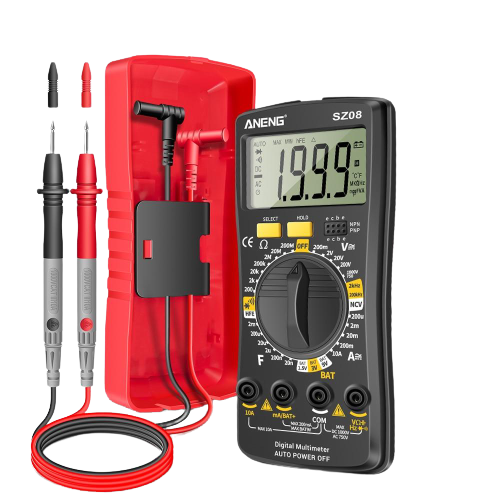
For this process, you will need a good and efficient multimeter so check out our article on the best multimeters.

Here’s a step-by-step process:
Gather materials
The first step is to gather all the necessary materials. Make sure you have the following items:
- Digital multimeter
- LED
a. Set the multimeter
Turn on the multimeter and set it to the diode test mode. This mode is usually denoted by a diode symbol or the letters “DIODE” on the multimeter’s dial or display.
If your multimeter does not have a diode test mode, switch to continuity mode. In the continuity mode, the working LED will produce a continuous beep.
b. Connect the multimeter leads.
Take the black (negative) lead of the multimeter and connect it to the common or negative terminal of the multimeter.
Take the red (positive) lead of the multimeter and connect it to the positive terminal of the multimeter labeled with the diode symbol.
c. LED polarity
Now take the LED and identify the positive and negative terminals. Usually, the longer terminal is positive (anode), and the shorter lead, is the negative (cathode) terminal.
Make a note of which lead is which. If you’re uncertain about the leads, you can refer to the datasheet.
d. Connection
Take the positive (anode) lead of the LED and connect it to the red (positive) lead of the multimeter.
Take the negative (cathode) lead of the LED and connect it to the black (negative) lead of the multimeter. Ensure that the connections are secure.
e. Observe multimeter reading
If the LED lights up during the test and the multimeter displays the expected voltage drop, it indicates that the LED is functional.
If the LED does not light up or the multimeter shows unusual readings, double-check the connections, polarity, and condition of the LED.
If the multimeter shows “OL” (over limit) or a high resistance value, the LED may be damaged or connected backward.
As you can see this method is very easy and practical. These instructions will help you use a digital multimeter to test an LED and find out its polarity and operation.
3. Using components tester
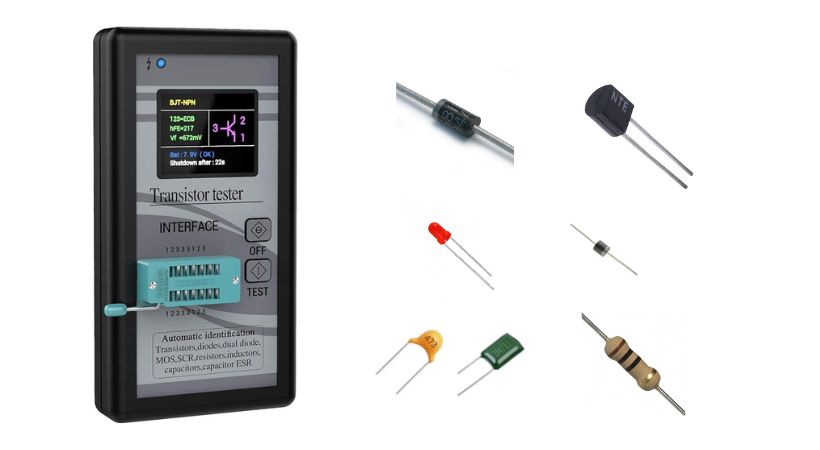
Testing an LED with a component tester, also known as a transistor tester or component analyzer, is a straightforward process.

Here’s how to use a component tester to test an LED step-by-step:
- The first thing is to ensure that the components tester you are using has a diode testing option.
- Turn on the component tester and allow it to initialize.
- Place the LED in the tester socket.
- After placing the LED, press the test button of the tester.
- If the LED is functional, the screen of the tester will show the forward voltage drop (Vf) and the forward current (If) of the LED.
- If the tester displays “unknown” or “damage,” there may be an issue with the LED or its connections.
The components tester can not be used for components that are already connected to the circuit board. By following the above-mentioned step you can easily test the LED functionality.
If you are curious about component tester, here is the link M328 Component Tester (Amazon link) for testing LED or other components.
Conclusion
Mastering the skill of testing LEDs is crucial for any electronics enthusiast or DIY enthusiast.
What if you select an LED and after connecting it you find out that the LED is not functional so to avoid such situations LED testing is essential.
Before testing LED follow safety precautions for safe testing.
- Disconnect the power to the circuit.
- Identify the LED polarity correctly.
- Handle the LED carefully
- Try to use the multimeter safely and make the connection correctly.
There are different methods used for testing LEDs such methods include the following.
- Visual Inspection
- Use of Digital Multimeter
- Use of Components Tester
All of the above methods are discussed in detail in this article. By practicing these methods, you’ll gain expertise in testing LEDs and expand your understanding of this essential electronic component.
This was all about LED testing, I hope you’ll enjoy it.
Thank you and stay blessed…
Other useful posts:
