
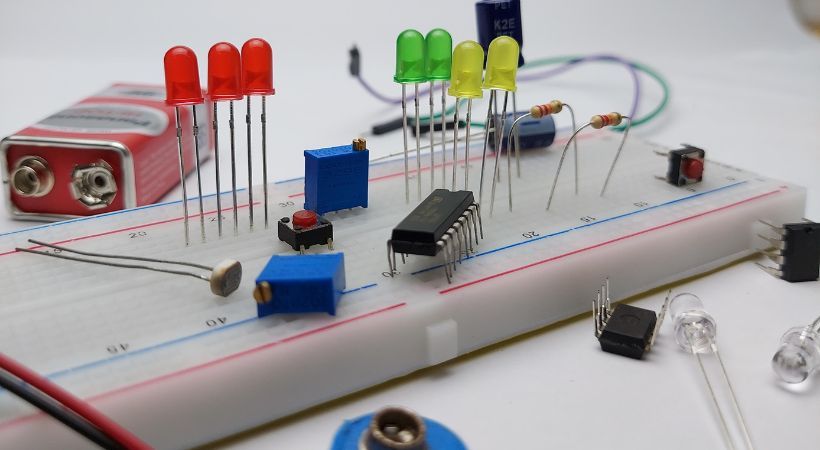
When working with breadboards, which are ideal for prototyping and testing circuits, it is crucial to place capacitors correctly to ensure the circuit functions as intended.
To properly place a capacitor on a breadboard, first identify its type. Ceramic capacitors can be simply inserted into the breadboard. For electrolytic capacitors, determine the pin configuration, trim the leads, and insert them into separate rows on the breadboard. Ensure the capacitor can withstand the applied voltage, and correctly identify the positive and negative pins for electrolytic capacitors before connecting them.
This article will provide a detailed guide on placing capacitor on a breadboard properly and what are common mistakes to avoid.
Capacitor placement on the breadboard
A capacitor is an electronic component used in circuits to store and release electrical energy in a circuit.
It consists of two conductive plates separated by insulated material called a dielectric. When the voltage is applied across the plates, an electric field is created and energy is stored on the plates.
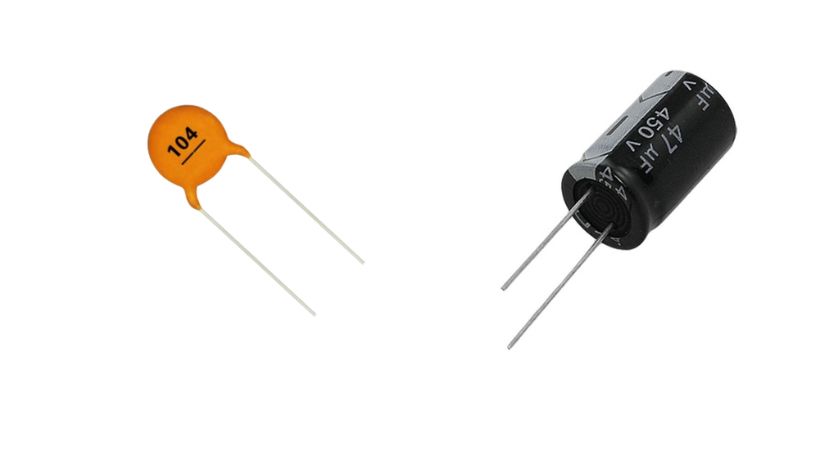
The capacitor has two types: polarized and non-polarized.
The polarized capacitors are called electrolytic capacitors and they have positive and negative terminals. These capacitors need to be connected with the correct pin configuration to prevent circuit malfunction.
On the other hand, ceramic capacitors are non-polarized capacitors and they don’t have positive and negative terminals. They can be connected in any pin orientation.
The electrolytic capacitor requires special attention when connecting it to the circuit as connecting the positive and negative terminals incorrectly can lead to component damage or can also cause overall circuit damage.
Now to place the capacitor properly you need to follow some steps.
Here is the step-by-step process of placing a capacitor on the breadboard.
Step-by-step process
If you want to place the capacitor correctly on the breadboard, follow the following steps.
1. Understand the breadboard
Understand the breadboard layout before connecting any components. It has small holes that are arranged in rows and columns.
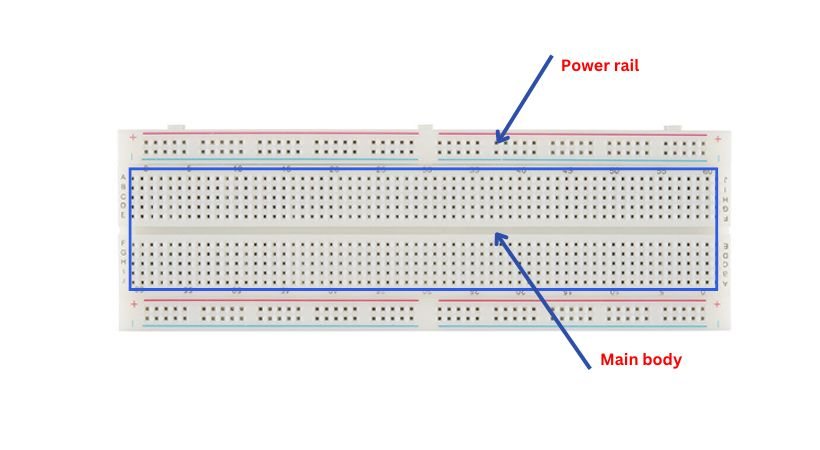
The breadboard has two portions: power railing and main component insertion area. The upper and lower edges of the breadboard are called power railings, holes in this area are connected horizontally.
Between the power railing, the area is for components, and the circuit is built in this area. The holes in this area are connected vertically. A capacitor will be placed in this area.
2. Identify the type of the capacitor
When placing a capacitor in a circuit on the breadboard, identification of the capacitor is a crucial step. As it defines how it will be connected in a circuit.
If the capacitor has the same length leads and no labels it means it is a non-polarized capacitor and can be connected in any orientation.
On the other hand, the capacitor having one long and one short lead means it is a polarized capacitor. It needs pin identification.
Understand the type of capacitor first.
3. Identify the capacitor pins
Now in the last step, you understand the capacitor type. It’s time to identify the pins of the capacitor.
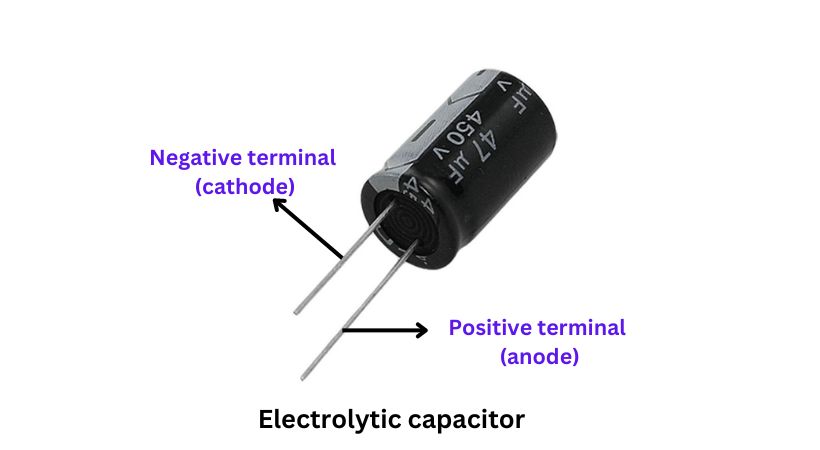
The capacitor is polarized then the shorter lead is negative and the longer lead is positive. You can also use the component tester to identify pin configuration.
For capacitor pin configuration check out our article:
For non-polarized you don’t need pin identification so you can skip this step.
4. Insert the capacitor leads
Trim the leads of a capacitor to make a strong connection on the breadboard. Take the capacitor and insert the leads into two holes in the same row.
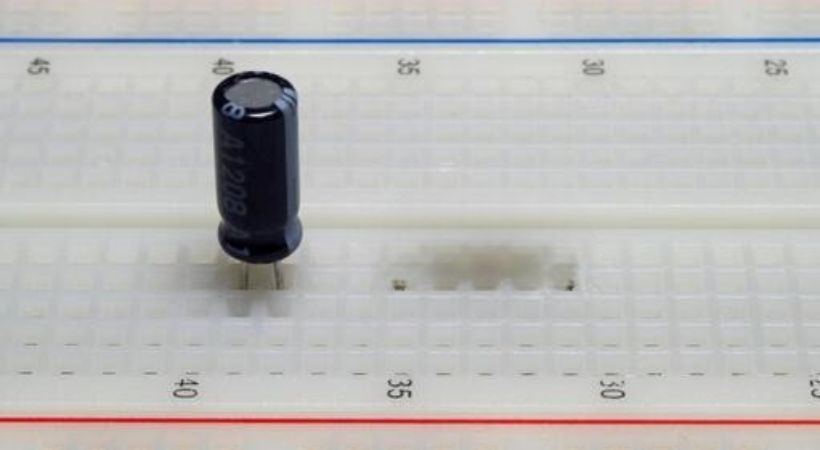
Ensure the leads are inserted firmly and that the capacitor is standing vertically.
5. Connect with the rest of the circuit
It’s time for the connection of the capacitor with the rest of the circuit. Use jumper wires to connect the capacitor to other components in your circuit, if necessary. Ensure the connections are secure.
If the capacitor is ceramic or non-polarized, any lead of the capacitor power supply positive and negative terminals can be connected.
However, if the capacitor is polarized, make sure to connect the positive terminal power supply to the positive lead of the capacitor and the negative terminal power supply to the negative lead of the capacitor.
Double-check the connections to make sure they follow your circuit diagram.
These are the steps you should follow if you want to connect a capacitor to the breadboard properly.
Let’s discuss the common mistakes that can be made as a beginner.
Common mistakes to avoid
When placing a capacitor on a breadboard, several common mistakes can lead to improper functioning of the circuit or damage to the components.
Here are some mistakes to avoid:
1. Incorrect polarity
The capacitors have a positive (+) and negative (-) lead. Connecting them backward can damage the capacitor or cause it to explode.
Always check the markings on the capacitor. The longer lead is usually positive, and the shorter lead is negative. Look for a stripe or minus sign on the body to identify the negative lead.
2. Loose connections
Not connecting the capacitor lead properly is also a mistake that can lead to damage or malfunction of the capacitor.
Make sure to push the leads firmly into the holes until they are secure.
3. Incorrect lead insertion
As the breadboard holes in rows and columns are interconnected. Inserting the leads of the capacitor into the wrong holes can cause unexpected connections and circuit malfunction.
Understand the breadboard layout and verify the capacitor connection according to the circuit schematics.
4. Improper handling
Improper handling of the capacitor can damage the capacitor. Bending the leads too close to the capacitor body or applying excessive force when inserting them into breadboard holes can damage the capacitor.
Always handle the capacitor leads gently and bend them carefully if needed.
Conclusion
Properly placing a capacitor on a breadboard is essential for ensuring the correct functioning of your circuit.
The capacitor is of two types: polarized and non-polarized. The polarized capacitor needs special attention when connecting it to the breadboard as it has positive and negative terminals.
By understanding the type of capacitor, carefully inserting the leads, and avoiding common mistakes, you can ensure reliable and efficient circuit performance.
To ensure longevity and avoid damage, always double-check connections and handle components with care.
That’s it, this was all about the placing capacitor on the breadboard properly.
I hope it will be helpful.
Thank you and stay blessed…
Other useful posts: