
As a beginner, properly putting a transistor on the circuit can be challenging as it requires correct terminal configurations. The transistor has three terminals, the base, emitter, and collector.
To correctly place a transistor on a breadboard, identify its terminal configuration using a multimeter, component tester, or datasheet. Ensure proper insertion and biasing while avoiding incorrect terminal connections and omitting current-limiting resistors. Verify all connections to ensure the transistor functions correctly in the circuit.
In this article, we’ll learn placing transistor on breadboard properly and what mistakes should be avoided.
Transistor placement on breadboard
A transistor is a semiconductor device used to amplify or switch electronic signals and electrical power. It is a fundamental building block of modern electronic devices.
It is a three-terminal device: Base, emitter, and collector. For the transistor to work as intended, it must be placed correctly on the breadboard and biased properly.
Here I will explain how can you put a transistor on the breadboard and how it can used as a switch.
Step b step process
Let’s see the step-by-step process of putting a transistor on the breadboard.
1. Identify the type of transistor
First, you have to identify a transistor. There are two types of transistors BJTs and FETs. Each one has three terminals but the name of the terminals is different.
The BJT and FET have PNP and NPN types. On the body of the transistor, the type is mentioned. So check the transistor carefully to know the type as you have to understand it datasheet.
2. Identify the terminals of a transistor
After identifying a transistor type, now next step is to identify the terminals or pins of the transistor.
The datasheet understanding will help you to find the emitter, base, and collector. Calculating voltage drop across the transistor using a multimeter also identifies terminals.
A component tester is a device that tells about the terminals within the second. Correctly identify the terminals in this step to avoid any further inconvenience while making the circuit.
3. Insert the transistor
After pin finding insert the transistor into the breadboard holes. Place the transistor on the breadboard.
Insert the pins into different holes of the same row to prevent short-circuiting.
4. Make the necessary connections
After insertion make the necessary connection to enable a transistor to perform. Connect the load or positive voltage to the collector.
Take a resistor, connect it to the base, and then to the positive voltage. The emitter should be connected to the ground or negative voltage.
Let’s see a simple circuit to light an LED using an NPN transistor.
Required components:
- NPN Transistor (2N2222)
- LED
- 1kΩ resistor (for base)
- 330Ω resistor (for LED)
- Breadboard and jumper wires
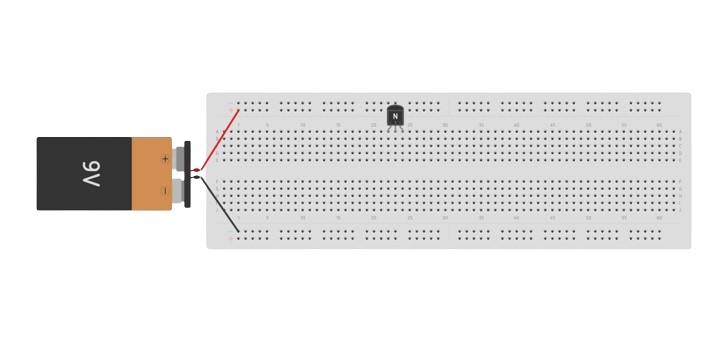
Take a transistor, and insert it into the breadboard. Connect the transistor’s emitter to the power supply’s negative terminal.
Connect one leg of the resistor to the transistor’s base and another leg of the resistor to the positive terminals of the power supply.
Connect the collector pin to one terminal of the 330Ω resistor. To the other terminal, connect the cathode of the LED and the anode should be connected to the positive of the power source.
Here is the circuit diagram of the above example.

Double-check all the connections before applying power. When voltage is applied to the circuit the LED will light up.
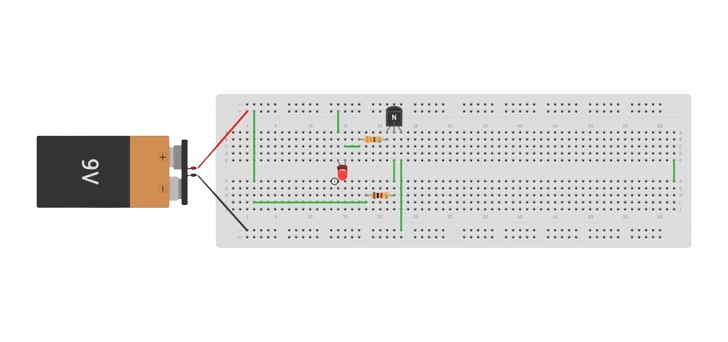
This setup demonstrates a basic switching application of an NPN transistor on a breadboard.
Common mistakes to avoid
Working with transistors on a breadboard can be straightforward. Still, there are several common mistakes that you should avoid to ensure your circuit functions correctly and to prevent damage to your components.
Here are some key points to keep in mind:
1. Wrong pin identification
Correct pin identification of the transistor is essential for proper working and performance. Misidentifying the pins of the transistor can cause malfunction of the whole circuit.
Always refer to the transistor’s datasheet to correctly identify the pin configuration before inserting it into the breadboard.
If you have difficulty understanding the datasheet use a component tester for easy and fast pin identification.
2. Improper insertion
Improper insertion also affects the transistor and circuit performance. Sometimes in a hurry, we do not properly insert the pins in the holes, so the circuit does not work after completion.
And, we wonder what happens to the circuit. Remember do not insert the transistor in the columns, always insert into the rows of the breadboard.
Ensure each transistor pin is inserted properly and correctly into a row on the breadboard.
3. Not connecting the limiting resistor
When you Fail to use current-limiting resistors with the base (for BJTs) or the gate (for FETs), it can lead to excessive current and cause damage to the transistor and other components.
Always use appropriate resistors to limit the current entering the base or gate. A common value is 1kΩ for the base of a BJT.
4. Incorrect biasing
Incorrect biasing of the transistor can lead to it not switching on or off properly.
For the BJT transistor, the base should be more positive than the emitter, which means the emitter will be grounded and the base will be connected to the power supply.
Make sure to correctly bias the transistor for a circuit to perform effectively.
By avoiding these common mistakes and following best practices, you can successfully integrate transistors into your breadboard circuits.
Conclusion
A transistor is a very crucial component in electronics for amplification and switching electrical signals.
For a circuit to function as intended, a transistor must be connected to the circuit correctly. The process of connecting a transistor to the breadboard is very simple.
All you have to do is to identify the transistor type and pins such as emitter, base, and collector. After the identification connect the transistor to the breadboard in such a way that its flat side faces toward you.
Make all the connections that make a transistor start working as intended. Mistakes can happen so make sure you avoid the following mistakes:
- Incorrect pin identifications
- Not properly inserting the pins into breadboard holes
- Ignoring the connection of the limiting resistor with the transistor’s base
- Improper biasing of the transistor
By avoiding these mistakes and following the step-by-step process, you can put the transistor on the breadboard properly and effectively.
That’s it, this was all about the transistor putting on the breadboard, I hope when you work with the transistor this article comes to your mind.
Thank you…
Other useful posts: