
An electronic prototype means creating a real circuit from a theoretical design to know if this circuit works or not. so A well-organized prototype simplifies debugging, enhances productivity, and accelerates the development cycle.
To organize a prototype for easy debugging, plan and document your work thoroughly. Use a clear schematic diagram with labeled components. Note any circuit changes in the document. On the breadboard, label components for identification, group related parts, and arrange them logically. These steps simplify debugging and improve organization.
In this article, we will explore strategies and best practices for prototype organization, ensuring smoother debugging.
Prototype organization
To identify issues with the prototype, the prototype must be well-organized, and each component must be clearly identified and labeled.
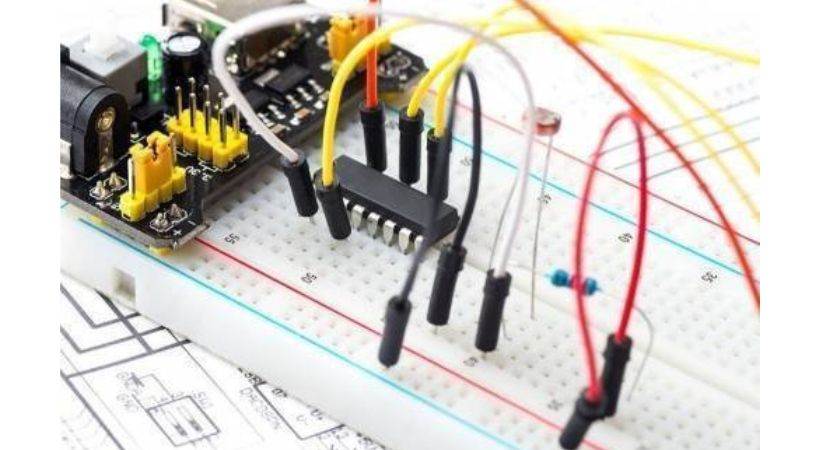
Prototyping in electronics means building a model of an electronic circuit to test and verify its functionality before manufacturing it in bulk. It is the combination of various electronic components and jumper wires.
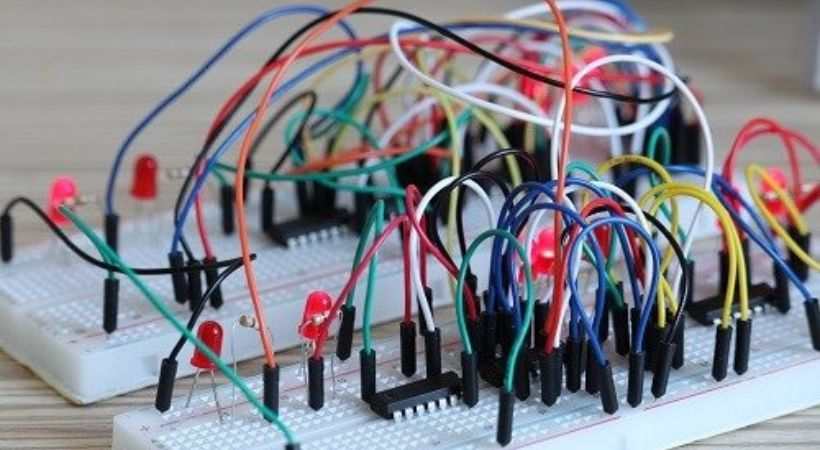
Sometimes the presence of many jumper wires and their connection with each other make the debugging process difficult. Debugging is the process through which we identify issues with the circuit.
So let’s discuss why the organizing of the prototype is important and how it helps in debugging.
Importance of organized prototype
Before delving into specific organizational strategies, it’s crucial to understand why organization is paramount in electronic circuit prototyping.
Here are some key reasons:
1. Fast debugging
An organized prototype makes it easy to debug it. The circuit prototype has components and wires that are not properly arranged and components are not labeled, this makes the debugging difficult.
Prototypes that are well-organized make debugging easier and faster by making it easier to find and identify problems.
Logically arranging components and clearly labeling connections make troubleshooting more systematic and reduce time spent on it.
2. Clarity and readability
If the prototype has clear and readable labels the debugging becomes easier. The labeling of the component is one of the signs that your circuit prototype is organized.
It facilitates an understanding of the circuit’s design and operation. This clarity helps with both the initial development process and later debugging work.
3. Reduced error
Another importance of the organized prototype is it reduces errors. If the components in the prototype are arranged neatly and jumper wires are also connected neatly and clearly.
This will help in identifying the issues correctly like which component is loosely connected or if there are any broken connections.
Keep your circuit prototype organized to identify issues without causing errors.
4. Enhance learning
An organized circuit prototype enhances learning. Developing a well-organized prototype promotes the storage of information and active learning.
As you methodically design, put together, and troubleshoot your circuit, you strengthen your understanding of basic electronic concepts and acquire invaluable practical experience.
This iterative process of learning through experimentation lays a solid foundation for future projects and challenges.
5. Reduced frustration
A well-organized prototype reduces misunderstandings and frustration, particularly for beginners who are still learning the basics of electronic design and debugging.
Prototyping is more enjoyable and rewarding when components are logically arranged and have clear labels, which makes it easier to follow signal paths and debug problems.
Tips for circuit prototyping organization
Here are some tips to help you maintain organization:
1. Plan the project
The first step is to plan the project. Begin with an understanding of your project and define the key components and connections.
This planning will help you establish a clear roadmap for your organized circuit prototype and reduce the need for last-minute modifications when building.
2. Use schematic diagrams
Before putting the prototype together, make thorough schematic diagrams of your circuit design.
Schematics act as a kind of visual blueprint that directs wiring arrangement and component positioning.
To improve clarity, consistently label parts, pins, and signal routes.
3. Choose the right tools
Select the right tools and materials for your project. Always take into account the size, and ease of assembly of the components.
Invest in quality breadboard, wires, and connectors to ensure reliable performance and durability. This will help you organize your circuit prototype.
4. Group components by functionality
Assemble parts according to the functions they perform in the circuit.
To make understanding and troubleshooting easier, group related components together and arrange them logically into clusters.
One way to organize components is to put signal-processing components in one part and power-related components (such as capacitors and voltage regulators) in another.
5. Label components and connections
Labeling the components and connections makes the prototype organized. So try to Clearly label components and connections using standardized conventions.
Use legible markings or color-coded labels to distinguish between different types of signals (e.g., power, ground, input, output).
Ensure that labels are placed adjacent to components or connections for easy reference.
6. Reduce the wire length
Sometimes using long wires also makes the prototype unorganized. The wire mixed up and the debugging became challenging.
To minimize signal degradation and make the prototype well-organized keep wire lengths as short as possible.
Use wire strippers to trim excess wire and neatly route connections to avoid tangling. Maintain a clean workspace free from unnecessary clutter to improve focus and productivity.
7. Document the changes
At the prototyping stage, we all make changes in the circuit to get efficient and reliable results. So any development you make during the prototyping process always document it.
Update schematic diagrams, and documentation to reflect the latest changes accurately. When the changes are documented lately if the circuit does so problem you can locate it easily.
By following the above steps and tricks you can organize your prototype and this will enable you to debug it easily and save time.
Conclusion
Circuit prototyping is an essential way to test and verify the circuit functionality before the permanent soldering connections.
When building a circuit prototype sometimes it becomes so much confusing because of lots of wires and no proper arrangement of the components.
So this makes the organized prototyping concept more popular because an organized prototype makes debugging easy and fast.
Here are some steps for your prototype…
- Always starts with planning your project.
- Build a schematic diagram for understanding different electrical connection routes.
- Considering the component size how will you connect it to the breadboard
- Label the components and connections
- Always minimize the wire length to avoid clutters
- Whenever make changes in the prototype always document them
You may successfully manage the challenges of prototyping and easily realize your electronic circuit designs if you pay close attention to organization.
This was all about prototype organization for easy debugging, I hope it will be helpful.
Thank you and stay blessed…
Other useful posts: