
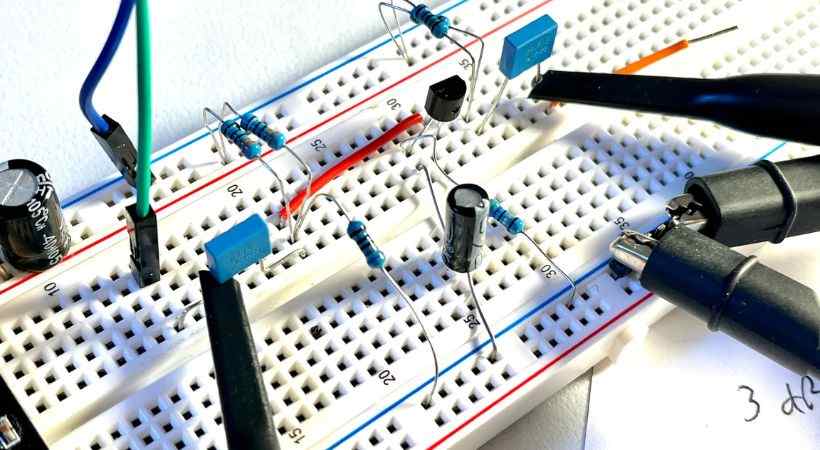
Placing the resistor correctly on a breadboard is crucial for proper circuit function.
To place a resistor in the breadboard, bend the resistor lead and place it in the holes of the breadboard. Avoid mistakes like connecting resistor leads loss, putting in a non-connecting row or column, not cutting the lead of the resistor, and using the wrong resistor value.
In this article, we’ll discuss in detail how to properly place resistor on breadboard and highlight common mistakes to avoid.
Putting resistor on breadboard
A resistor is an electronic components that limit or regulate the flow of electrical current in a circuit. It is one of the fundamental components used in electrical and electronic circuits.
The resistance of the resistor is measured in ohms (Ω). The resistance indicates how much a resistor will resist the flow of current.
Whenever you want to limit the flow of current connect a resistor. For this reason, we have to connect the resistor correctly on the breadboard to get the intended functionality of the circuit.
The placement of the resistor is not rocket science, it’s straightforward.
Let’s discuss how can you put the resistor on breadboard properly.
Step-by-step process
Properly placing resistors on a breadboard is crucial for ensuring the correct functionality of your circuit.
Here’s a detailed guide on how to put the resistor effectively.
1. Understand the breadboard layout
First, you have to understand the breadboard layout. Learn about the power railings and the area where components should be inserted.
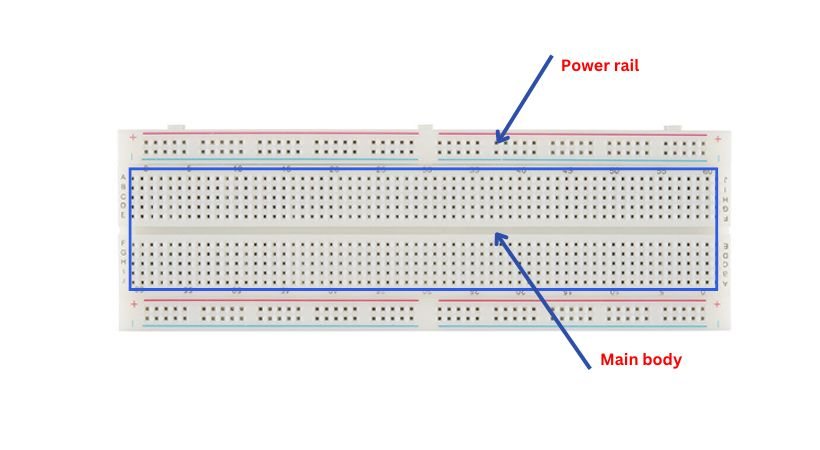
The breadboard has holes that are arranged in rows and columns. It has two portions: power railings and main component insertion area.
Power railings are the long rows running along the top and bottom of the breadboard, typically used for power supply connections (positive and negative/ground).
The main components insertion area is the main grid where components are inserted. Each strip consists of connected rows or columns (depending on the breadboard type).
2. Select a resistor
Now select a resistor that is suitable for your project. Ensure you have the correct resistor value (measured in ohms) for your circuit.
Identify the resistor values by color code or use a multimeter. Make sure the resistor can handle the power dissipation required by your circuit.
3. Insertion of resistor
It’s time to insert the resistor on the breadboard. Before insertion straight the leads of the resistor, if the leads are too long trim the leads for a strong connection.
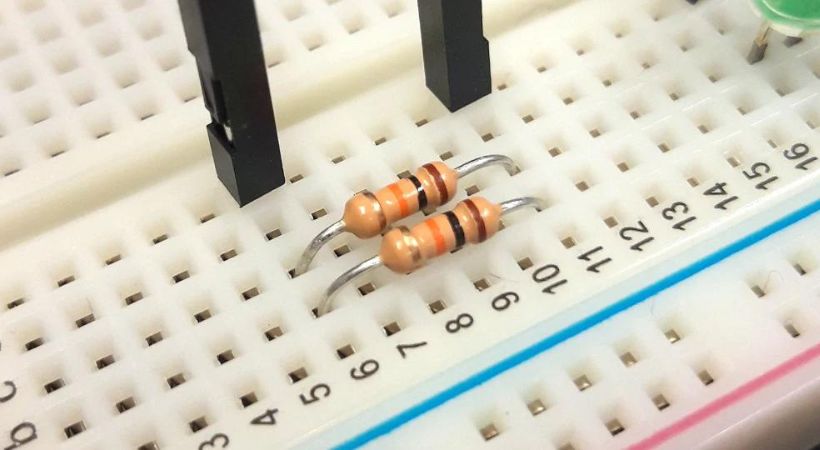
Place each lead of the resistor in separate, non-connected rows. If the resistor’s leads are inserted into connected rows, it will short-circuit the resistor.
Double-check the circuit schematic to confirm that the resistor is connected in the right place.
4. Use pumper wires
Use the jumper wires to connect the different components on the circuit to the resistor. Use color-coded jumper wires to keep track of connections, especially in more complex circuits.
5. Verify connections
Make sure that, following your circuit schematic, each resistor is connected to the appropriate nodes.
To ensure the proper connections, check the connections and resistor values using a multimeter.
These are some steps that will help you in placing the resistor correctly on a breadboard.
Common mistakes to avoid
Here are some mistakes that can made while connecting a resistor on a breadboard and can be avoided.
1. Incorrect lead placement
Incorrect placement of leads on the breadboard is a mistake that a beginner can make.
Avoid placing both leads of the resistor into connected rows on the breadboard, which will bypass the resistor’s function and create a short circuit.
To make sure the resistor is positioned between the right nodes, double-check the circuit design.
2. Poor connections
When connecting a component on the breadboard requires some force because the holes of the breadboard have metal strips and components should be inserted into these strips for strong and reliable connections.
Ensure that the resistor leads are firmly seated in the breadboard holes to prevent intermittent connections otherwise loosely resistor connection will result in a power electrical connection.
3. Excess lead length
The resistance leads are lengthy, and if the resistor with long leads is put into the breadboard improperly, it will cause a poor connection.
It will also cause short circuits if they touch other components or leads.
Cut the leads using wire cutters to the proper length. Give them just enough length so that they fit inside the breadboard firmly without touching or overlapping other parts.
4. Incorrect resistor value
Using the wrong resistor also causes malfunction of the circuit. Suppose you connect a 10kΩ resistor but you connect a 100kΩ resistor so all the voltage will drop across the resistor.
Before putting the resistor in the breadboard, make sure its value is correct using a multimeter or the color code. Check your circuit design again to make sure the right value is being used.
5. Ignoring the power rating
If the resistor with insufficient power rating is used, it will cause overheating. Make sure the resistor you connect can handle power dissipation.
Calculate the power rating of the resistor while selecting it.
6. Excess force
Applying too much force to the resistor while connecting it to the breadboard can damage the resistor or the breadboard.
Gently place the resistor leads into the breadboard holds, do not apply excess force.
As a beginner, these are some mistakes that you can make when placing the resistor on the breadboard. For proper insertion of the resistor try to avoid all these mistakes.
Conclusion
The correct placement of the resistor is essential for the effective and reliable performance of an electronic circuit.
The resistor is one of the main components of any electronic circuit to limit or regulate the current.
The placement of the resistor on the breadboard is very straightforward, here are the steps you should follow:
- First, understand the breadboard layout
- Select the resistor you want to place
- Straight and trim the leads of the resistor
- Place the leads of the resistor in holes in the breadboard
- Make sure both leads are inserted in the different holes
- Verify the connections using circuit schematics
As a beginner, you can make a lot of mistakes but don’t worry by making mistakes it means you are learning something new.
The common mistakes that should be avoided while placing a resistor on the breadboard are:
- Do not place the resistor incorrectly to cause a short circuit
- Make sure you insert the resistor properly into the holes
- Always trim the leads of the resistor up to the appropriate length
- Keep in mind the power rating of the resistor
Avoid these mistakes while placing the resistor on the breadboard.
That’s all about the proper placement of the resistor on the breadboard, I hope when you are placing the resistor on the breadboard this article will pop up in your mind.
Thank you and have a blessed life…
Other useful post: